Precision has never been more critical in 3D design and manufacturing, with industries demanding accuracy at every stage. The integration of solidworks 3d scanning is rapidly changing how designers, engineers, and manufacturers approach complex projects.
By mastering solidworks 3d scanning, professionals can unlock major time savings, achieve higher accuracy, and open up creative possibilities that were previously out of reach. Imagine streamlining your workflow and reducing errors, all while expanding what you can create.
This guide will walk you step by step through everything you need to know to leverage solidworks 3d scanning for unmatched precision. We will cover hardware selection, software integration, workflow optimization, troubleshooting, and the latest trends you need to know for 2026.
Follow along to unlock the full potential of your SolidWorks toolkit and stay ahead in the world of 3D innovation.
Understanding 3D Scanning Technology for SolidWorks
The evolution of 3D scanning has dramatically changed how professionals approach design and manufacturing. By combining digital scanning with advanced CAD platforms, teams now achieve higher accuracy and efficiency. In this section, we explore how solidworks 3d scanning is transforming workflows and enabling new possibilities for creators.
What is 3D Scanning?
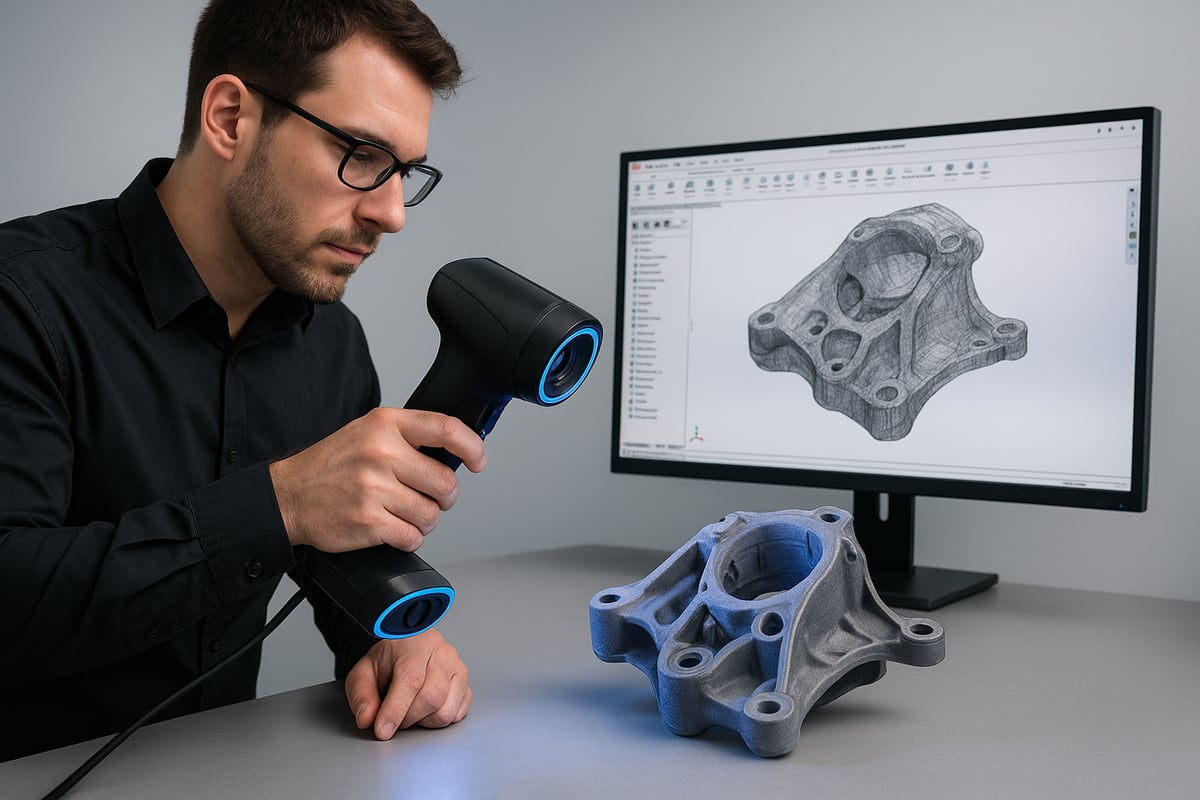
3D scanning is the process of capturing the physical shape and dimensions of an object using specialized hardware and software. This technology creates digital replicas by collecting surface data, which can then be imported into CAD systems.
There are three main types of 3D scanning technologies:
- Laser scanners: Use laser beams to measure distances and contours.
- Structured light scanners: Project patterns of light to map surfaces.
- Photogrammetry: Combines multiple images to generate 3D models.
The main advantages of 3D scanning include rapid data capture, high accuracy, and the ability to reproduce complex geometries. Engineers and designers use solidworks 3d scanning for product development, quality control, and even reverse engineering. For example, scanning a legacy machine part allows teams to recreate detailed CAD models for refurbishment or redesign.
How 3D Scanning Integrates with SolidWorks
SolidWorks offers native support for point clouds and mesh files, making it easy to bring scanned data directly into your design environment. Commonly supported file formats include STL, OBJ, and PLY, which are widely used in the industry.
Once imported, scan data can be edited and converted into solid or surface models. For instance, a furniture designer can scan a custom chair leg, import the mesh into SolidWorks, and modify the design to fit new requirements. Compatibility between scanning hardware and SolidWorks is crucial for a seamless workflow.
Recent advancements, such as Geomagic for SOLIDWORKS, have made solidworks 3d scanning even more efficient by integrating scanning and modeling tools directly into the CAD interface.
Key Benefits of SolidWorks 3D Scanning
Using solidworks 3d scanning provides several significant advantages for professionals:
- Greater accuracy: Directly capturing real-world objects reduces manual modeling errors.
- Faster prototyping: Scanned models speed up the product iteration process.
- Customized fit: Tailor designs to match existing parts or unique specifications.
Industry data shows that 3D scanning can reduce modeling time by up to 70 percent compared to traditional methods. In the automotive sector, for example, engineers use scanned data to reproduce complex parts with minimal error, ensuring that replacements fit perfectly without time-consuming adjustments.
Common Challenges and Limitations
Despite its benefits, solidworks 3d scanning is not without obstacles. Large scan files can slow down workflows and require significant computing power. Reflective or transparent surfaces, such as glass or polished metals, may cause scanning errors or incomplete data.
Post-processing is often necessary to clean up noise and fix mesh issues. Compatibility between scanning hardware and SolidWorks software also needs careful attention. For example, importing a scan of a glossy table may result in mesh errors that require manual correction before the model can be used effectively.
Industry Use Cases and Statistics
The adoption of solidworks 3d scanning is growing rapidly across industries. Recent surveys indicate that 75 percent of manufacturers now use 3D scanning for quality control and inspection tasks.
In the medical field, prototyping custom devices with scanned data has improved patient outcomes and sped up development cycles. Small businesses and DIY creators are also leveraging these tools for jewelry design and small-scale manufacturing. For instance, jewelers scan intricate pieces to create precise digital models for casting and customization, maximizing both efficiency and creativity.
Choosing the Right 3D Scanning Hardware for SolidWorks
Selecting the best hardware for solidworks 3d scanning is a crucial first step to achieving precise, reliable results. With the market offering a wide range of scanners, understanding the differences and knowing what to look for will help you build a workflow that meets your needs.
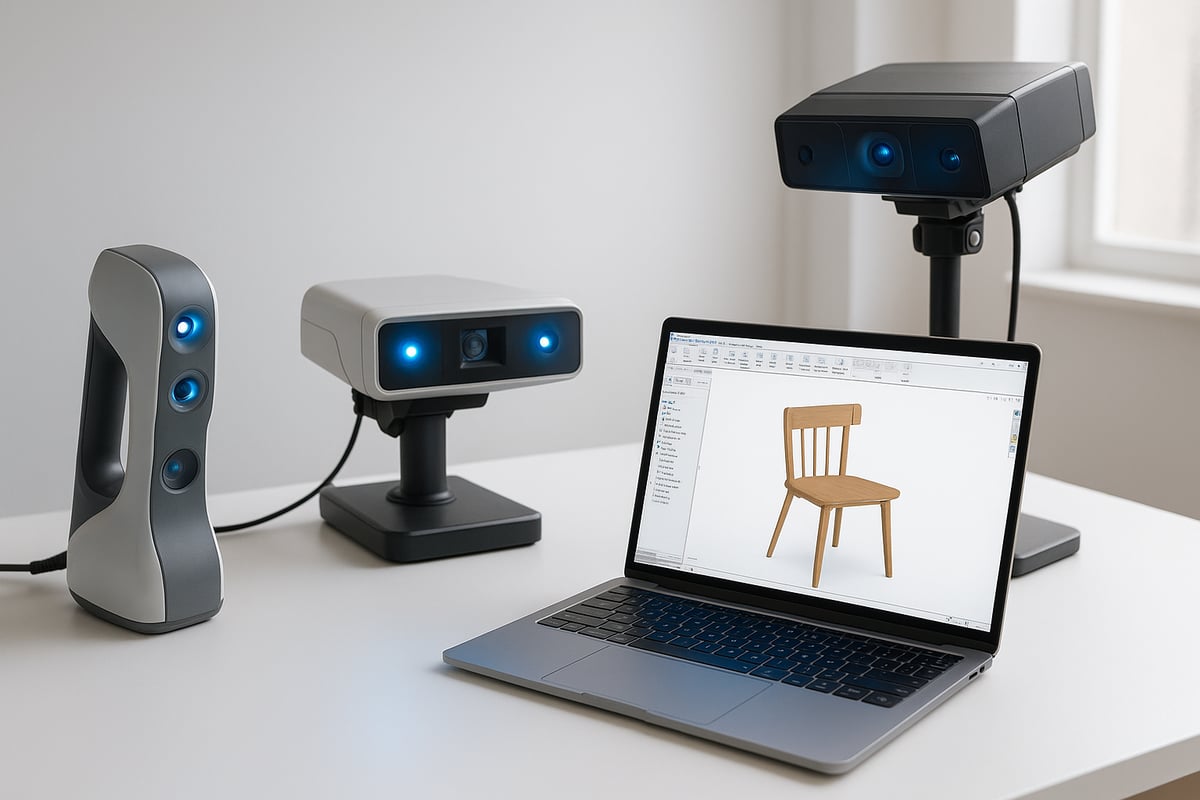
Overview of 3D Scanner Types
When considering solidworks 3d scanning, it's important to know the main types of 3D scanners available. Each type serves specific project requirements, from quick on-site scans to high-detail industrial applications.
Here's a quick comparison:
| Scanner Type | Accuracy | Speed | Typical Use Cases | Price Range |
|---|---|---|---|---|
| Handheld | Medium-High | Fast | Furniture, interiors, field | $3,000–$25,000 |
| Desktop | High | Moderate | Small objects, jewelry | $2,000–$15,000 |
| Industrial | Very High | Variable | Automotive, aerospace | $20,000+ |
Handheld scanners are ideal for scanning furniture on-site, while desktop models excel in capturing intricate details of smaller objects. Industrial systems provide the highest accuracy for large-scale manufacturing.
Key Features to Consider
Solidworks 3d scanning requires careful review of technical specs before you buy. The most important features include:
- Resolution and accuracy: Look for scanners with high resolution and precise accuracy, especially for engineering or custom parts.
- Scan volume: Make sure the scanner can handle the size of your typical objects.
- Connectivity: USB, Wi-Fi, or SD card options affect your workflow flexibility.
- Software integration: Check if the scanner comes with tools that export directly to SolidWorks-compatible formats.
For example, when modeling interior décor, compare the scan volume and accuracy of different models to ensure your scanner captures every detail needed for subsequent CAD work.
Leading 3D Scanners Compatible with SolidWorks
Several top brands stand out for solidworks 3d scanning, offering reliability and strong user support. Popular models include Artec Eva, Creaform HandySCAN, and EinScan Pro series. These scanners are known for seamless integration with CAD software.
User feedback often highlights Artec Eva for its ease of use in product design. According to industry surveys, customer satisfaction remains high for these brands due to robust hardware and reliable software. For enhanced workflow efficiency, many designers utilize add-ins like ReverseEngineering.com Launches 2025 ScanToCAD Add-in Line, which streamlines the connection between 3D scanning and SolidWorks.
Budget Considerations and ROI
When planning for solidworks 3d scanning, weigh the costs and benefits carefully. For small studios, entry-level or leased scanners can provide a cost-effective solution, while enterprises may need high-end equipment for demanding tasks.
Consider these factors:
- Purchase vs. lease: Leasing can reduce upfront cost and ease upgrades.
- Maintenance: Budget for regular calibration and potential repairs.
- Support: Choose brands with strong technical support to minimize downtime.
Small businesses often see a strong ROI from integrating 3D scanning, as the automation and accuracy lead to faster project turnaround and reduced labor costs.
Hardware Setup Best Practices
Setting up your hardware correctly is essential for optimal solidworks 3d scanning results. A well-lit, stable environment reduces scan errors and improves accuracy.
Follow these tips:
- Use diffuse lighting to avoid harsh shadows.
- Ensure your scanning surface is stable and vibration-free.
- Regularly calibrate your scanner to maintain precision.
- Arrange your workspace so you have easy access to both the scanner and computer.
For example, a home workshop can be optimized by dedicating a corner with controlled lighting and a sturdy table, ensuring every scan starts with the right foundation.
Preparing and Executing a Successful 3D Scan in SolidWorks
Preparing and executing a successful 3D scan in SolidWorks involves a series of precise steps. By focusing on each stage, you can maximize accuracy and efficiency in your solidworks 3d scanning workflow. Let’s break down the process for the best results.
Pre-Scan Preparation Steps
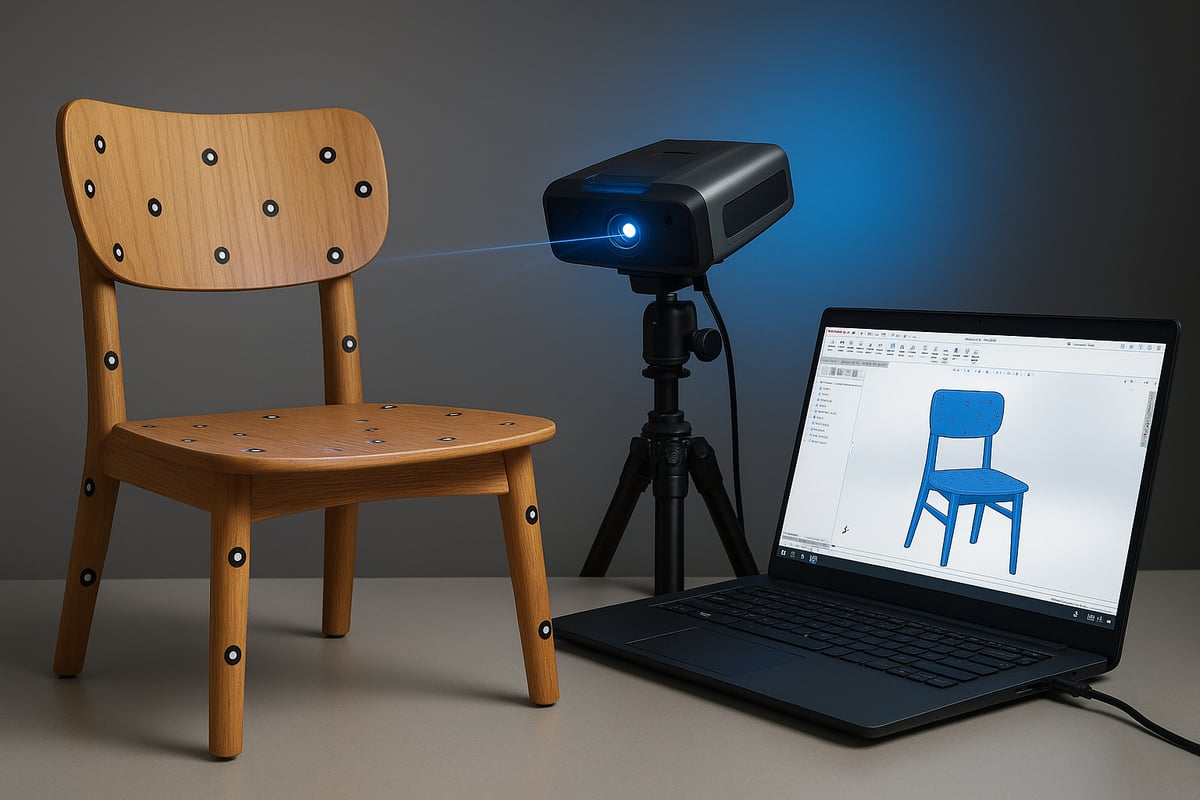
Preparation is crucial for solidworks 3d scanning success. Start by thoroughly cleaning the object to remove dust, grease, or fingerprints that could disrupt scan accuracy. Secure the object on a stable surface, ensuring it won’t move during scanning. For full coverage, position the object so all features are accessible.
- Clean and dry the object
- Place on a non-reflective surface
- Apply alignment markers or targets if your scanner requires them
For example, prepping a wooden chair involves wiping down surfaces, checking for loose parts, and applying non-permanent markers to aid in scan alignment. Proper preparation minimizes errors and streamlines the scanning process.
Scanning Process: Step-by-Step
Begin the solidworks 3d scanning process by powering up and calibrating your scanner according to the manufacturer’s instructions. Adjust scanner settings based on the object’s size and material. Most scanners allow you to tweak resolution, exposure, and scan speed.
- Calibrate the scanner for current lighting and environment
- Set resolution and scan area in the software
- Plan scan passes to capture all angles
Execute the scan, moving the scanner steadily to capture every surface. Monitor the scan in real time using the software interface. For instance, when scanning a decorative lamp, ensure you capture intricate details by overlapping scan paths and pausing to review data quality.
Post-Scan Data Processing
After scanning, import the raw scan data into your scanner’s software for initial processing. This is a key step in solidworks 3d scanning. Remove background noise and clean up the mesh to eliminate stray points or artifacts.
- Use built-in tools to delete unwanted data
- Align and merge multiple scans into a single mesh
- Fill small holes and smooth surfaces
Export the processed mesh in a SolidWorks-compatible format such as STL or OBJ. For complex objects, like a multi-piece sculpture, combine scans carefully to ensure all geometry is preserved.
Importing Scan Data into SolidWorks
Importing your processed scan data is central to solidworks 3d scanning. SolidWorks supports formats including STL, OBJ, and PLY. Use the “Insert” or “Import” function to bring the mesh into a new or existing project.
If you encounter errors, check the mesh for non-manifold edges or excessive file size. SolidWorks’ ScanTo3D add-in or third-party plugins can assist with advanced imports. For practical inspiration, discover how scanned furniture models are used for room planning and customization in this Using 3D CAD furniture models guide.
Editing and Refining Scanned Models in SolidWorks
Once imported, refine your scanned model using solidworks 3d scanning tools. Convert the mesh to a surface or solid using “Surface from Mesh” or “Mesh BREP” features. Inspect the model for holes, intersecting faces, or other imperfections.
- Repair geometry using SolidWorks’ repair tools
- Add features such as holes, fillets, or custom profiles
- Modify dimensions for specific design requirements
For example, you might customize a scanned furniture leg by adding mounting holes or adjusting its curvature to fit a new design.
Quality Control and Verification
Quality control is the final step in a robust solidworks 3d scanning process. Use SolidWorks measurement tools to compare your digital model with the original object’s dimensions. Verify that all critical features are within tolerance.
- Measure key points and surfaces
- Document the scanning and editing process for traceability
- Perform a final visual inspection in SolidWorks
For instance, when producing a replacement part, ensure the digital model matches the original with minimal deviation, supporting reliable manufacturing outcomes.
Optimizing Workflow: Tips and Best Practices for Precision
Achieving the highest level of precision with solidworks 3d scanning requires more than just quality hardware and software. Workflow optimization is essential for consistent, accurate results. By following best practices in data handling, mesh processing, integration, error reduction, and automation, you can streamline your process and unlock maximum value from your scans.
Data Management and File Organization
Organizing your project files is the foundation of an efficient solidworks 3d scanning workflow. Clear structure helps prevent lost data and makes collaboration seamless.
Consider these best practices:
- Create dedicated folders for each project, separating raw scans, processed meshes, and CAD files.
- Use consistent naming conventions for files and folders.
- Implement version control, either manually or with versioning tools, to track changes and avoid overwriting.
A simple folder structure could look like this:
| Folder Name | Contents |
|---|---|
| /Raw_Scans | Original scan files |
| /Processed_Mesh | Cleaned and simplified data |
| /CAD_Models | SolidWorks project files |
| /References | Photos, notes, documentation |
Backing up your data regularly ensures you never lose progress on solidworks 3d scanning projects.
Mesh Cleanup and Simplification Techniques
After capturing your object, raw scan data often contains noise or excessive detail. Mesh cleanup is vital for smooth solidworks 3d scanning integration.
Key steps include:
- Removing stray points and artifacts using built-in or third-party tools.
- Decimating the mesh to reduce polygon count while preserving critical features.
- Smoothing surfaces to eliminate roughness and improve model quality.
Techniques like hole filling and edge fixing further prepare your mesh for CAD conversion. Efficient mesh cleanup not only accelerates editing in SolidWorks but also prevents slowdowns or errors during modeling.
Integrating Scanned Data with Existing CAD Models
Combining new scans with existing assemblies is a common requirement in solidworks 3d scanning workflows. Proper alignment and merging are crucial for accuracy.
Best practices:
- Use reference geometry or markers on physical objects to aid digital alignment.
- Rely on SolidWorks’ tools for positioning and mating scanned parts within assemblies.
- Carefully inspect overlapping areas to ensure seamless integration.
In interior design, for example, integrating scanned furniture and fixtures into room layouts enables precise planning and creative experimentation. For a deeper look at practical applications, see this Interior design guide with 3D models.
Reducing Errors and Improving Accuracy
Consistent calibration and validation are key to minimizing errors in solidworks 3d scanning. Small mistakes in setup or scanning can lead to significant problems in the final model.
To maintain high accuracy:
- Calibrate your scanner before each session, following manufacturer guidelines.
- Scan in a controlled environment with stable lighting and minimal vibration.
- Use SolidWorks measurement tools to compare digital models against original dimensions.
Regularly reviewing your workflow helps identify sources of error and fine-tune your process for even better results.
Time-Saving Automation Tools and Plugins
Automation can dramatically boost efficiency in solidworks 3d scanning pipelines. Batch processing tools and plugins help eliminate repetitive manual tasks.
Consider these options:
- Use SolidWorks macros to automate mesh-to-solid conversions.
- Explore third-party plugins for batch importing or mesh repair.
- Set up scripts for file renaming or organization.
By leveraging automation, you can dedicate more time to design and innovation, trusting that routine steps are handled quickly and reliably.
Troubleshooting and Overcoming Common 3D Scanning Issues
Even the most advanced solidworks 3d scanning setups can encounter issues during the workflow. Knowing how to identify and address these problems ensures a smoother experience and more precise results. Let’s explore some of the most frequent challenges and how to overcome them.
Common Scanning Errors and Fixes
Incomplete scans and missing data are frequent obstacles in solidworks 3d scanning projects. These issues often stem from poor object positioning, inadequate lighting, or obstructed surfaces.
- To prevent gaps, rotate the object and scan from multiple angles.
- For reflective or transparent materials, apply a temporary matte spray or powder to improve scan accuracy.
- Always review scan previews in real time to spot missed areas early.
If you encounter persistent gaps, consider re-scanning the problematic sections and merging the new data. Troubleshooting these errors as you go helps maintain a high-quality workflow.
File Import and Compatibility Problems
Importing scan files into SolidWorks can raise compatibility concerns, especially if formats like OBJ or PLY are not directly supported. In the solidworks 3d scanning workflow, failed imports often result from mismatched file types or corrupted data.
Use dedicated conversion tools to change file formats, such as converting OBJ to STL, before importing. Third-party plugins can also bridge compatibility gaps and streamline the process.
If an import fails, double-check that your scan data meets SolidWorks' requirements. Consistent file naming and version control will further reduce confusion and errors during the import stage.
Mesh Repair and Surface Reconstruction
Even after successful import, mesh files may contain holes, overlaps, or excessive noise. In solidworks 3d scanning, addressing these issues is crucial for creating accurate CAD models.
Use mesh editing software to:
- Identify and close holes in the mesh.
- Remove duplicated or overlapping faces.
- Smooth out rough or noisy areas.
When reconstructing surfaces for solid modeling, leverage SolidWorks ScanTo3D or compatible plugins for a cleaner, more precise output. Regular mesh repair ensures your scanned models are ready for editing and manufacturing.
Maintaining Hardware and Software Performance
To keep your solidworks 3d scanning system reliable, regular hardware calibration and software updates are essential. Dust, vibration, or outdated firmware can introduce errors or degrade accuracy.
- Calibrate your scanner according to the manufacturer’s guidelines.
- Clean lenses and sensors regularly.
- Update scanning software and SolidWorks for optimal compatibility.
Staying informed about technological advancements in 3D scanning helps you anticipate changes and maintain a competitive edge. Proactive maintenance extends the lifespan of your equipment and supports consistent, high-quality results.
The Future of SolidWorks 3D Scanning: Trends and Innovations for 2026
The landscape of solidworks 3d scanning is set to evolve rapidly by 2026, driven by breakthroughs in hardware and software. As industries demand higher precision and faster turnaround, the tools and workflows supporting solidworks 3d scanning are adapting at an unprecedented pace.
Advances in 3D Scanning Technology
Next-generation solidworks 3d scanning hardware promises faster capture speeds, higher resolutions, and increased portability. Lightweight handheld scanners are making fieldwork more efficient, while AI-driven scanning enables automatic feature recognition and reduces manual intervention.
Autonomous scanning systems, such as those discussed in FlyCo: Autonomous 3D Structure Scanning, are emerging as valuable solutions for large-scale environments. These innovations allow users to scan complex structures with minimal oversight, streamlining data collection and expanding the reach of solidworks 3d scanning in diverse applications.
Software Improvements and AI Integration
Software advancements are reshaping the way solidworks 3d scanning data is processed and utilized. Enhanced algorithms provide automatic mesh cleanup, reducing the time required for manual editing. AI-assisted modeling tools within SolidWorks are beginning to convert raw scans into parametric models with a single click.
This level of automation not only increases productivity but also minimizes errors when transitioning from scan data to finished CAD models. As these intelligent features mature, users can expect smoother workflows and greater design flexibility, making solidworks 3d scanning a core asset in digital manufacturing.
Expanding Applications Across Industries
Solidworks 3d scanning is finding new applications in sectors like medical, automotive, architecture, and interior design. Its ability to capture intricate details supports rapid prototyping, customization, and preservation projects. For example, integrating scanned models into interior design workflows enables designers to visualize and modify real-world spaces with precision.
The intersection of scanning and CAD modeling is transforming how professionals approach projects, as explored in Interior design styles with CAD. This synergy empowers businesses to deliver tailored solutions and accelerate time to market, further fueling the adoption of solidworks 3d scanning across industries.
Preparing for the Next Wave: Skills and Learning
Staying at the forefront of solidworks 3d scanning requires continuous learning and adaptation. As new technologies emerge, professionals must upskill to leverage advanced hardware and AI-driven software features effectively.
Online courses, webinars, and industry forums are valuable resources for keeping pace with innovations. Designers who invest in ongoing education will be best positioned to harness the full potential of solidworks 3d scanning, gaining a competitive edge in a rapidly changing digital landscape.
As you’ve seen, mastering 3D scanning with SolidWorks opens up a world of precision and creative opportunity—whether you’re designing custom furniture, streamlining workflows, or bringing intricate ideas to life. If you’re ready to put these concepts into practice and want a head start on creating your own professional designs, you don’t have to start from scratch. You can explore a curated library of premade 3D CAD furniture assets that seamlessly integrate with SolidWorks, saving you hours and helping you focus on what matters most: innovation and accuracy. Take your next step and Learn how to create furniture designs with premade 3D cad.


Share:
Furniture Elegant Guide: Elevate Your Space in 2026