
Stellen Sie sich vor, Sie verwandeln Ihr Wohnzimmer in eine Ausstellung Ihrer Kreativität, und das alles mit Möbeln, die Sie selbst entworfen und gebaut haben. Im Jahr 2025 ermöglicht die "make my furniture"-Bewegung absoluten Anfängern, maßgeschneiderte Stücke zu schaffen, selbst ohne Vorkenntnisse.
Dieser Leitfaden führt Sie durch jeden Schritt des Prozesses, von der Planung und Materialauswahl bis hin zur Beherrschung wesentlicher Werkzeuge und Fertigungstechniken. Sie erfahren, wie Sie häufige Fehler vermeiden und das Selbstvertrauen gewinnen, Ihren eigenen Raum zu personalisieren.
Wenn Sie bereit sind, den DIY-Trend anzunehmen, praktische Fähigkeiten zu entwickeln und wirklich Ihre Möbel zu machen, hilft Ihnen diese umfassende Ressource, noch heute zu beginnen.
Grundlagen des Möbelbaus verstehen
Eine "make my furniture"-Reise im Jahr 2025 zu beginnen, bietet mehr als nur einen kreativen Auslass – es ist eine praktische, lohnende Möglichkeit, Ihren Wohnraum zu gestalten. Ob Sie neugierig auf den Prozess sind oder sofort starten möchten, das Verständnis der Grundlagen gibt Ihnen Selbstvertrauen und eine solide Basis für den Erfolg.
Was bedeutet "Make My Furniture" im Jahr 2025?
Im Jahr 2025 bedeutet "make my furniture", eigene Möbelstücke für zu Hause mit zugänglichen Materialien und Techniken zu entwerfen und zu bauen. Der Trend hat sich weiterentwickelt und heißt Anfänger mit leicht verständlichen Plänen, Online-Ressourcen und Gemeinschaftsunterstützung willkommen. Heute reichen die Projekte vom Zusammenbauen von Flachpack-Kits über das Upcycling von Secondhand-Funden bis hin zu maßgeschneiderten Bauten. Für einen detaillierten Anfängerüberblick siehe den Essential DIY Furniture Guide 2025.
Vorteile, eigene Möbel zu machen
Die Entscheidung, "make my furniture" zu machen, kann Ihnen im Vergleich zum Kauf im Handel erheblich Geld sparen. Sie erhalten volle kreative Kontrolle und können jedes Stück nach Ihrem Geschmack und Raum anpassen. Dieser Prozess unterstützt auch die Nachhaltigkeit, indem er die Verwendung umweltfreundlicher Materialien und Upcycling fördert. Das Ergebnis sind einzigartige Möbel, die Ihre Persönlichkeit und Werte widerspiegeln.
Gängige Arten von DIY-Möbelprojekten
Die meisten neuen Handwerker beginnen mit praktischen Projekten wie Tischen, Stühlen, Regalen oder Aufbewahrungseinheiten. Beliebte Anfängerprojekte sind Couchtische, Bänke und Nachttische. Jedes bietet eine überschaubare Einführung in Werkzeuge und Techniken und liefert gleichzeitig funktionale, attraktive Ergebnisse, die Sie stolz zu Hause präsentieren können.
Wesentliche Fähigkeiten für Anfänger
Um "make my furniture" zu machen, benötigen Sie einige grundlegende Fähigkeiten:
- Grundlegende Holzbearbeitung und Verbindungen
- Genaues Messen und Schneiden
- Einfache Montagetechniken
- Einführung in digitales Design, wie die Verwendung von CAD-Software
Mit diesen Fähigkeiten können Sie Pläne interpretieren, Designs anpassen und Ihr erstes Projekt selbstbewusst abschließen.
Sicherheit zuerst: Wichtige Vorsichtsmaßnahmen
Sicherheit ist bei jedem "make my furniture"-Projekt unerlässlich. Tragen Sie stets Schutzausrüstung wie Handschuhe, Schutzbrillen und Masken beim Schneiden oder Schleifen. Gehen Sie sorgfältig mit Werkzeugen um und befolgen Sie die Anweisungen des Herstellers. Richten Sie einen gut beleuchteten, aufgeräumten Arbeitsplatz ein, um Risiken zu minimieren und einen reibungslosen Arbeitsablauf zu gewährleisten.
Zeit- & Budgeterwartungen
Erwarten Sie eine Lernkurve, wenn Sie meine Möbel herstellen. Einfache Projekte können ein Wochenende dauern, während größere Stücke mehr Zeit benötigen. Material- und Werkzeugkosten variieren, aber viele Anfänger beginnen mit einem Basisset und erschwinglichen Materialien. Sorgfältige Planung hilft, Ausgaben und Zeitaufwand im Griff zu behalten.
Wichtige Trends im Jahr 2025
Aktuelle Trends bei make my furniture-Projekten umfassen modulare und multifunktionale Designs, die sich an wechselnde Bedürfnisse anpassen. Viele Hersteller integrieren auch Technologie, indem sie smarte Funktionen wie kabelloses Laden oder verstellbare Beleuchtung hinzufügen. Diese Trends spiegeln einen wachsenden Fokus auf Praktikabilität, Innovation und persönlichen Stil wider.
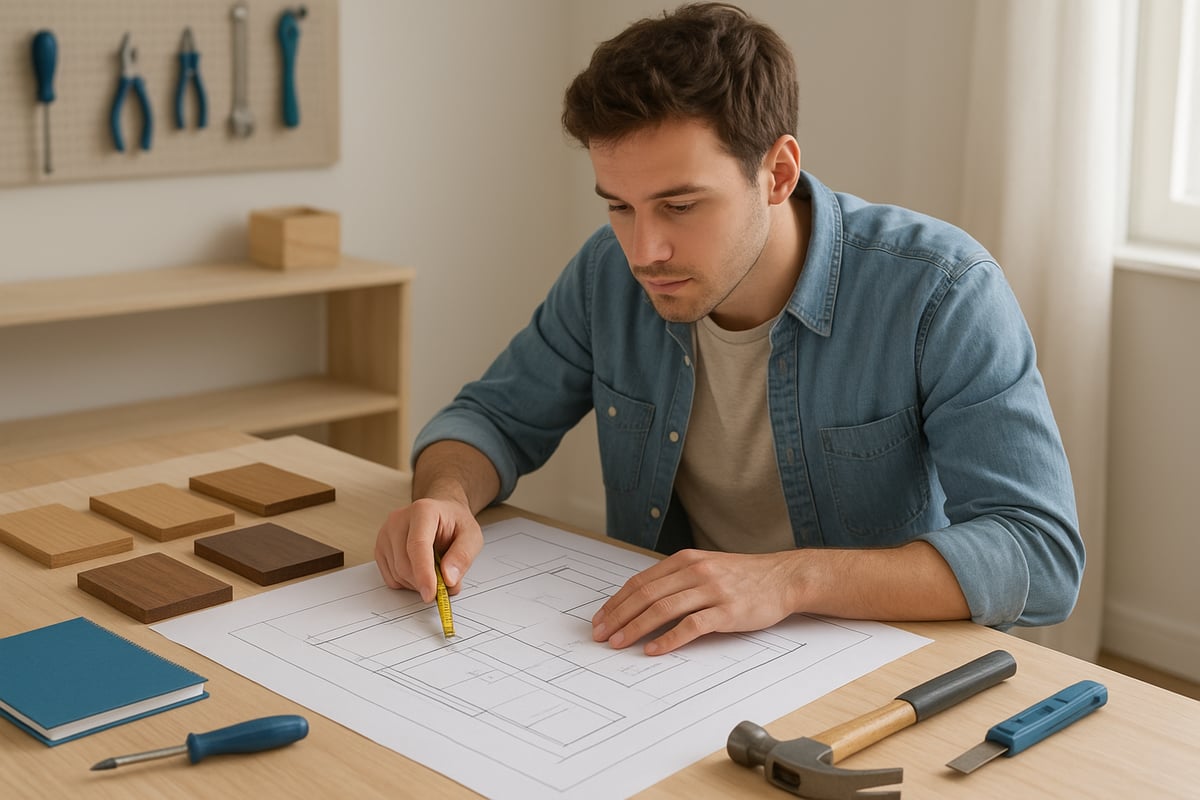
Planung Ihres Möbelprojekts
Bevor Sie mit der Herstellung meiner Möbel beginnen, ist eine durchdachte Planung unerlässlich. Die Wahl des richtigen Projekts, das Verständnis Ihres Raums sowie die Vorbereitung von Materialien und Werkzeugen können den Unterschied zwischen einer lohnenden Erfahrung und Frustration ausmachen. Dieser Abschnitt führt Sie durch jeden Schritt, um Ihr Projekt erfolgreich zu starten.
Das richtige Projekt für Ihr Fähigkeitsniveau wählen
Wenn Sie sich daran machen, meine Möbel herzustellen, beurteilen Sie Ihre aktuellen Fähigkeiten ehrlich. Anfänger sollten mit einfachen Stücken wie kleinen Tischen oder Regalen beginnen. Berücksichtigen Sie Ihre verfügbaren Werkzeuge, den Arbeitsplatz und die Zeit.
Fragen Sie sich:
- Haben Sie grundlegende Handwerkzeuge?
- Ist Ihr Arbeitsplatz groß genug für die Montage?
- Fühlen Sie sich sicher bei einfachen Messungen und Schnitten?
Die Auswahl eines Projekts, das Ihrem Fähigkeitsniveau entspricht, ist der Schlüssel zum Aufbau von Selbstvertrauen. Beginnen Sie mit einem einfachen Design und nehmen Sie dann nach und nach komplexere Projekte in Angriff, während Ihre Fähigkeiten wachsen.
Möbelpläne finden und verwenden
Um meine Möbel erfolgreich herzustellen, verwenden Sie klare, anfängerfreundliche Pläne. Suchen Sie online, in Büchern oder über Bildungsplattformen nach kostenlosen oder kostenpflichtigen Plänen. Konzentrieren Sie sich auf Designs, die Schritt-für-Schritt-Diagramme und Materiallisten enthalten.
Beim Durchsehen eines Plans:
- Studieren Sie jedes Diagramm sorgfältig.
- Beachten Sie die benötigten Materialien und Maße.
- Stellen Sie sicher, dass die Anleitungen Ihrem Fähigkeitsniveau entsprechen.
Wenn Sie Ihr Verständnis vertiefen möchten, sollten Sie einen Online-Möbeldesign-Kurs in Betracht ziehen, um wichtige Design- und Bautechniken zu erlernen. Gut ausgewählte Pläne machen den Bauprozess reibungsloser und angenehmer.
Ihr Raum vermessen
Genaue Messungen sind entscheidend, wenn Sie meine Möbel herstellen. Beginnen Sie mit der Messung des vorgesehenen Standorts für Ihr neues Möbelstück. Verwenden Sie für beste Ergebnisse ein zuverlässiges Maßband oder einen Laser-Entfernungsmesser.
Beispiel: Für ein maßgeschneidertes Bücherregal messen Sie die Wandhöhe, Breite und Tiefe. Lassen Sie zusätzlichen Platz für Sockelleisten und nahe Möbel.
Werkzeuge zum Messen:
- Standard-Maßband
- Laser-Entfernungsmesser
- Zimmermannswinkel
Notieren Sie alle Maße, bevor Sie mit dem Bau beginnen. So stellen Sie sicher, dass Ihr fertiges Stück perfekt in Ihr Zuhause passt.
Materialauswahl: Holz, Metall und Alternativen
Die Materialauswahl bestimmt Aussehen, Haltbarkeit und Kosten, wenn Sie meine Möbel herstellen. Holz ist klassisch, Metall bietet modernen Reiz, und Alternativen wie Verbundplatten können budgetfreundlich sein.
Materialien vergleichen:
| Material | Vorteile | Nachteile |
|---|---|---|
| Holz | Warm, leicht zu bearbeiten und zu reparieren | Kann kostspielig sein |
| Metall | Robust, moderner Look | Benötigt Spezialwerkzeuge |
| Verbundmaterial | Erschwinglich, leicht | Weniger langlebig, schwerer zu überarbeiten |
Umweltfreundliche Tipps:
- Wählen Sie nachhaltig gewonnenes oder wiederverwertetes Holz.
- Entdecken Sie lokale Lieferanten für einzigartige Funde.
Balancieren Sie Ästhetik, Funktion und Budget bei der Auswahl Ihrer Materialien.
Erstellung einer Material- und Werkzeug-Checkliste
Eine organisierte Checkliste erleichtert Ihr "make my furniture"-Projekt. Listen Sie alle benötigten Artikel vor Beginn auf, um Verzögerungen zu vermeiden.
Beispiel-Checkliste für einen kleinen Tisch:
- Holzbretter (auf Maß zugeschnitten)
- Schrauben oder Dübel
- Schleifpapier (verschiedene Körnungen)
- Holzleim
- Farbe oder Beize
- Maßband
- Säge, Bohrer, Schraubendreher
Kreuzen Sie jeden Artikel ab, sobald Sie ihn gesammelt haben. Dies verringert das Risiko, Materialien mitten im Projekt zu vermissen, und sorgt für effizienten Fortschritt.
Festlegung eines realistischen Zeitplans und Budgets
Um meine Möbel effizient herzustellen, teilen Sie Ihr Projekt in klare Phasen auf: Planung, Einkauf, Zuschnitt, Montage, Finish und Installation. Schätzen Sie Zeit und Kosten für jede Phase.
Beispielzeitplan:
- Planung und Einkauf: 1–2 Tage
- Zuschneiden und Montage: 1 Tag
- Finish und Trocknung: 1–2 Tage
Budgetüberlegungen:
- Materialien (Holz, Beschläge, Oberflächen)
- Werkzeuge (Kauf oder Miete)
- Unerwartete Ausgaben
Die Erfassung Ihrer Zeit und Ausgaben hilft, Überraschungen zu vermeiden und hält Ihr Projekt von Anfang bis Ende angenehm.
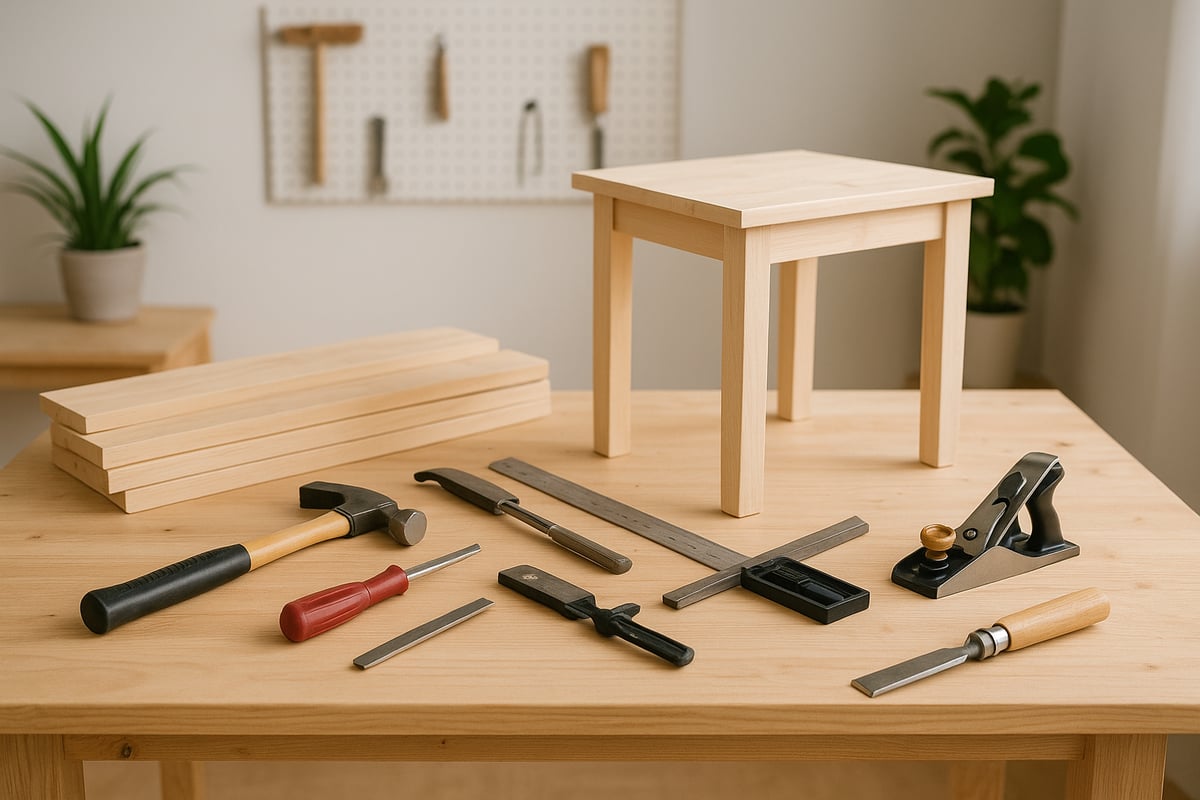
Essentielle Werkzeuge und Arbeitsplatz-Einrichtung
Die richtige Einrichtung von Werkzeugen und Arbeitsplatz ist die Grundlage für jedes erfolgreiche "make my furniture"-Projekt. Als Anfänger hilft die Investition in das Wesentliche, sicher, effizient und mit Vertrauen zu bauen.
Unverzichtbare Werkzeuge für Anfänger
Für den Start Ihrer "make my furniture"-Reise benötigen Sie nur wenige essentielle Werkzeuge. Handwerkzeuge bilden das Rückgrat jedes Anfänger-Werkzeugsatzes. Sie benötigen eine Säge zum Schneiden, einen Hammer zum Zusammenbauen, Schraubendreher zum Befestigen und Stechbeitel zum Formen von Holz.
Elektrowerkzeuge wie Bohrmaschine oder Schleifmaschine können Aufgaben beschleunigen und sauberere Ergebnisse liefern. Ein einfaches Starter-Kit kann für unter 200 $ zusammengestellt werden und sollte ein Maßband, Klemmen und einen Winkel für Genauigkeit enthalten.
Hier ist eine schnelle Checkliste für das Starter-Kit:
- Handsäge oder Stichsäge
- Hammer
- Schraubendreher (Schlitz- und Kreuzschlitz)
- Bohrmaschine
- Schleifpapier (verschiedene Körnungen)
- Klammern
- Maßband und Winkel
Mit diesen Werkzeugen kann jeder Anfänger sicher und selbstbewusst mit dem "make my furniture"-Projekt beginnen.
Einrichtung Ihres Arbeitsplatzes
Ein dedizierter Arbeitsplatz ist entscheidend für einen reibungslosen "make my furniture"-Prozess. Entscheiden Sie, ob Sie drinnen oder draußen arbeiten möchten. Drinnen wählen Sie einen gut belüfteten Bereich wie eine Garage oder ein Gästezimmer. Draußen sorgen Sie für Schutz vor Witterungseinflüssen.
Eine stabile Werkbank ist für die Stabilität unerlässlich. Gute Beleuchtung reduziert Fehler und Augenbelastung. Verwenden Sie Regale oder Lochwände, um Werkzeuge und Materialien zu organisieren. In kleinen Wohnungen oder Häusern maximieren klappbare Bänke und wandmontierte Aufbewahrung den Platz.
Ein sauberer, organisierter Arbeitsplatz steigert nicht nur die Produktivität, sondern macht jede "make my furniture"-Session auch angenehmer.
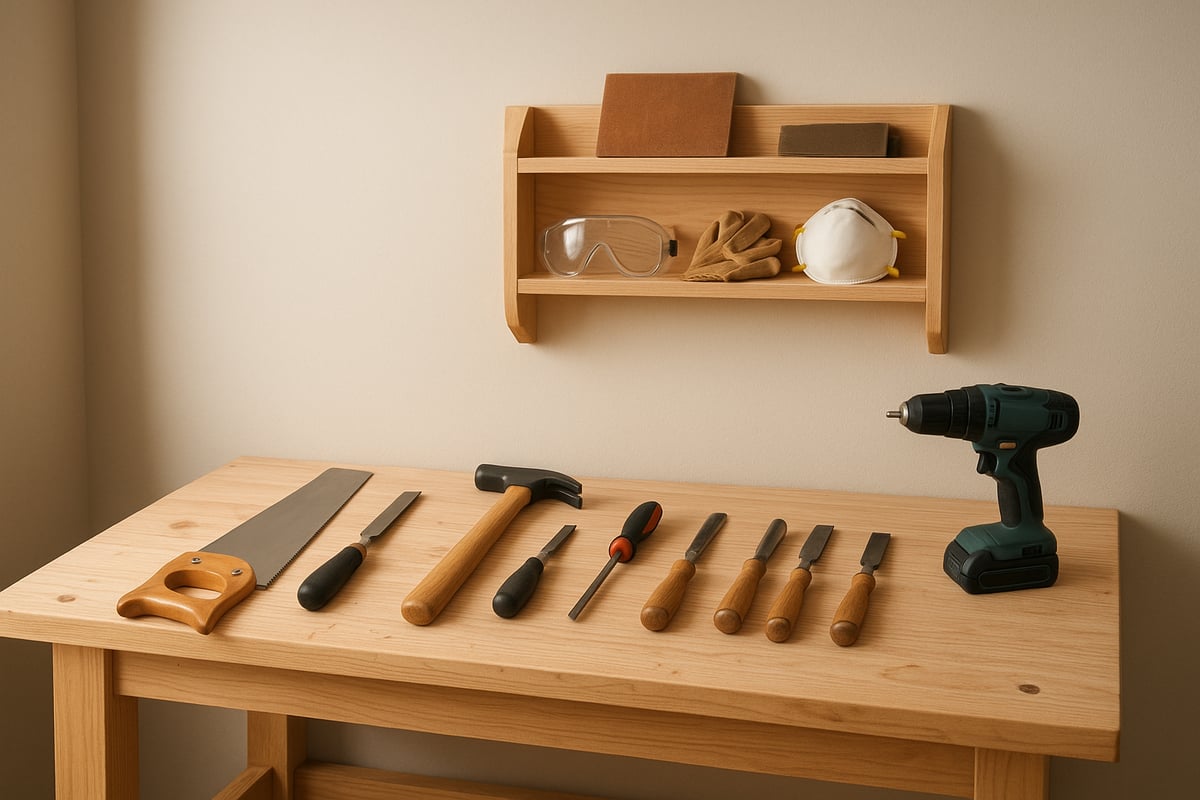
Werkzeugsicherheit und Wartung
Sicherheit steht im Mittelpunkt jedes "make my furniture"-Projekts. Tragen Sie stets Schutzausrüstung: Handschuhe, Schutzbrille und Staubmaske. Gehen Sie sorgfältig mit Werkzeugen um und befolgen Sie die Herstelleranweisungen.
Richtige Lagerung verhindert Unfälle. Bewahren Sie scharfe Werkzeuge in Behältern auf und ziehen Sie Elektrowerkzeuge aus der Steckdose, wenn sie nicht verwendet werden. Regelmäßige Wartung, wie das Reinigen und Ölen von Handwerkzeugen, verlängert deren Lebensdauer und gewährleistet sicheren Betrieb. Zum Beispiel sollten Werkzeuge nach jedem Gebrauch gereinigt und eine dünne Ölschicht auf Metallteile aufgetragen werden, um Rost zu verhindern.
Indem Sie Sicherheit und Wartung priorisieren, genießen Sie Ruhe und konsistente Ergebnisse, während Sie meine Möbel herstellen.
Aufrüstung mit dem Wachstum
Mit wachsender "make my furniture"-Fähigkeit möchten Sie vielleicht Ihr Werkzeugset erweitern. Erwägen Sie Investitionen in fortgeschrittene Werkzeuge wie Fräsen oder Tischsägen für komplexere Projekte. Das Mieten von Spezialgeräten ist eine kostengünstige Möglichkeit, sie auszuprobieren, bevor Sie kaufen.
Bewerten Sie Ihre Bedürfnisse und Ihren Arbeitsbereich, bevor Sie aufrüsten. Qualitätswerkzeuge halten länger und liefern bessere Ergebnisse. Halten Sie Ihren Arbeitsplatz flexibel, indem Sie modulare Aufbewahrung oder mobile Arbeitsstationen hinzufügen.
Eine schrittweise Aufrüstung stellt sicher, dass Sie nur in das investieren, was Ihre "make my furniture"-Ambitionen wirklich unterstützt.
Digitale Werkzeuge: CAD- und Design-Software
Digitale Werkzeuge verändern, wie Anfänger "make my furniture" machen. CAD (computerunterstütztes Design) Software ermöglicht es Ihnen, Ihr Projekt zu visualisieren, Maße anzupassen und Fehler vor dem Bau zu erkennen.
Kostenlose und kostenpflichtige CAD-Programme sind für jedes Fähigkeitsniveau verfügbar. Digitale Modelle vereinfachen die Planung und helfen, Ideen klar zu kommunizieren. Für Einsteiger in digitales Design bietet Easy 3D CAD for Everyone zugängliche Werkzeuge, die die Planung Ihrer Möbel intuitiv und unterhaltsam machen.
Die Einbindung digitaler Werkzeuge in Ihren Arbeitsablauf führt zu präziseren, professionelleren Ergebnissen und macht Ihre "make my furniture"-Reise noch lohnender.
Schritt für Schritt: Wie Sie Ihr erstes Möbelstück herstellen
Ihr erstes "make my furniture"-Projekt zu starten ist aufregend und machbar, auch wenn Sie neu im DIY-Bereich sind. Diese Schritt-für-Schritt-Anleitung führt Sie durch die Grundlagen, vom ersten Entwurf bis zum Platzieren Ihres fertigen Möbelstücks.
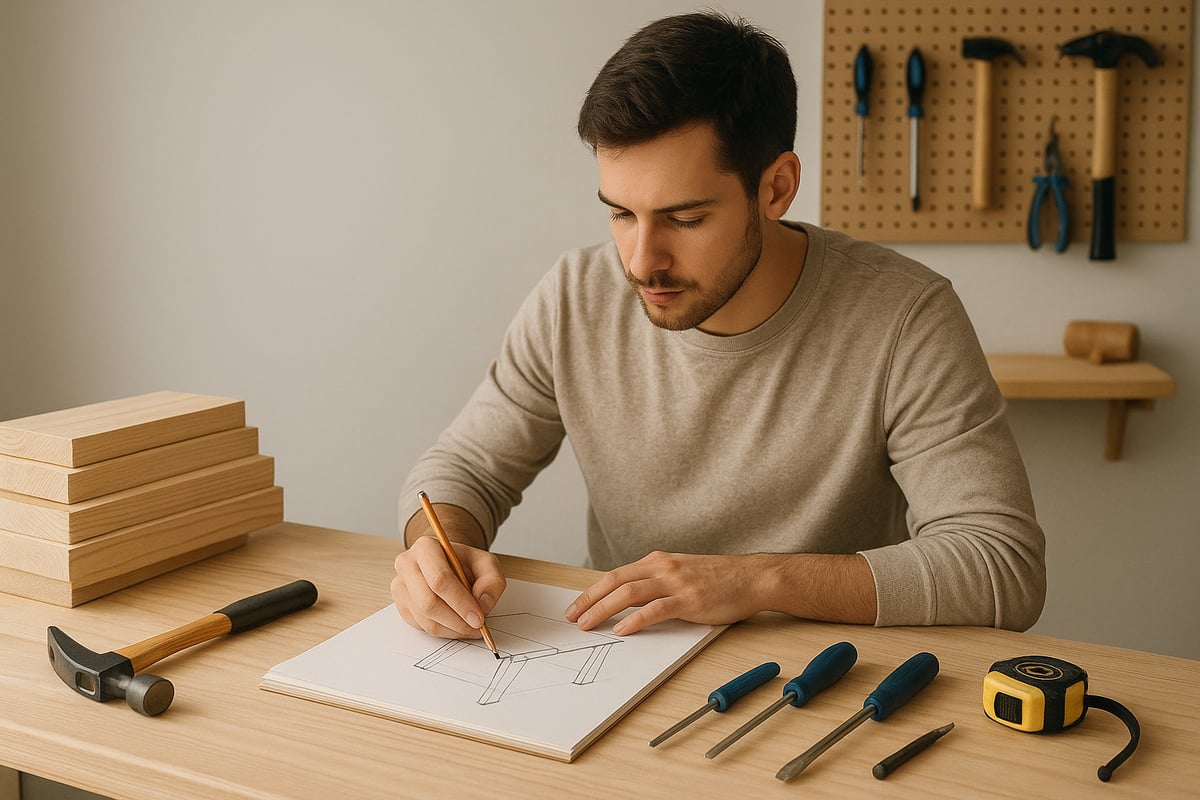
Schritt 1: Entwurf und Planung
Jede erfolgreiche "make my furniture"-Reise beginnt mit einem klaren Design. Beginnen Sie damit, Ihre Idee auf Papier zu skizzieren oder einfache CAD-Software zu verwenden. So können Sie Proportionen visualisieren und potenzielle Herausforderungen erkennen, bevor Sie mit dem Bau beginnen.
Passen Sie das Design an Ihren verfügbaren Platz und Ihre funktionalen Anforderungen an. Wenn Sie beispielsweise einen Standard-Beistelltisch modifizieren, messen Sie den vorgesehenen Platz aus und aktualisieren Sie die Maße entsprechend. Diese Anpassung unterscheidet den "make my furniture"-Ansatz vom Kauf von Massenware.
Ein einfacher Tisch mit einem Regal darunter kann ein großartiges Einstiegsprojekt sein, bei dem Sie das Messen, Verleimen und Finishen üben können. Denken Sie daran, ein durchdachter Plan spart später Zeit und Material.
Schritt 2: Materialien und Werkzeuge sammeln
Mit Ihrem Plan in der Hand ist es Zeit, alles zu sammeln, was Sie brauchen. Besuchen Sie lokale Baumärkte oder stöbern Sie online nach hochwertigem Holz, Beschlägen und Befestigungsmaterial. Prüfen Sie beim Materialeinkauf auf Geradheit, Glätte und Mängel.
Überprüfen Sie Ihr Werkzeugset anhand der Anforderungen Ihres Projekts. Die meisten Anfängerprojekte "make my furniture" benötigen nur grundlegende Werkzeuge wie eine Säge, Bohrmaschine, Schraubendreher, Maßband und Klemmen. Machen Sie vor Beginn eine kurze Inventur, um Unterbrechungen zu vermeiden.
Hier ist eine Beispiel-Checkliste für einen kleinen Tisch:
| Artikel | Menge |
|---|---|
| 1x12" Kiefernbrett | 2 |
| 2x2" Beine | 4 |
| Holzschrauben | 16 |
| Holzleim | 1 Flasche |
| Schleifpapier (verschiedene Körnungen) | 3 Blätter |
| Bohrer & Bits | 1 Satz |
| Säge | 1 |
| Klammern | 2 |
Schritt 3: Bereiten Sie Ihren Arbeitsplatz vor
Ein sauberer, organisierter Arbeitsplatz ist für jedes "make my furniture"-Projekt unerlässlich. Beginnen Sie damit, Unordnung zu beseitigen und stellen Sie sicher, dass Sie genügend Arbeitsfläche zum Schneiden und Montieren haben. Gute Beleuchtung erleichtert das Erkennen von Markierungen und vermeidet Fehler.
Sicherheit sollte Ihre oberste Priorität sein. Sorgen Sie für eine gute Belüftung, besonders wenn Sie schleifen oder Oberflächen behandeln. Tragen Sie stets Handschuhe, Schutzbrille und Staubmaske. Für umfassende Sicherheitsrichtlinien und Tipps zur Aufrechterhaltung einer sicheren Umgebung lesen Sie diesen Woodworking Safety Tips for Beginners-Leitfaden.
Ordnen Sie Ihre Werkzeuge so an, dass sie leicht erreichbar sind, und halten Sie Kabel und scharfe Gegenstände aus den Durchgängen fern. Diese Vorbereitung hilft Ihnen, effizient und sicher zu arbeiten.
Schritt 4: Zuschneiden und Materialvorbereitung
Messen Sie nun Ihre Materialien gemäß Ihrem Plan. Markieren Sie jeden Schnitt deutlich mit Bleistift und Winkel. Überprüfen Sie die Maße doppelt, bevor Sie mit dem Schneiden beginnen, um Abfall zu vermeiden.
Verwenden Sie eine Handsäge oder elektrische Säge, je nach Ihrem Komfort. Sägen Sie immer langsam und lassen Sie das Werkzeug die Arbeit machen. Nach dem Schneiden schleifen Sie alle Kanten und Flächen, um Splitter und raue Stellen zu entfernen. Dies ist ein wichtiger Teil des "make my furniture"-Prozesses, da glatte Materialien leichter zu montieren und zu bearbeiten sind.
Beispielsweise beim Zuschneiden von Sperrholz für ein Regal: Klemmen Sie das Brett sicher fest und verwenden Sie eine Richtlatte als Führung. Nehmen Sie sich Zeit, um Genauigkeit und saubere Ergebnisse zu gewährleisten.
Schritt 5: Montage und Verbindungstechnik
Nachdem alle Teile vorbereitet sind, beginnen Sie mit der Montage Ihres Stücks. Folgen Sie Ihrem Plan für Verbindungsmethoden wie Schrauben, Dübel oder Winkel. Fügen Sie die Komponenten zunächst trocken zusammen, um sicherzustellen, dass alles passt, bevor Sie Kleber oder Befestigungen anbringen.
Achten Sie darauf, dass Kanten bündig und Verbindungen fest sind. Für die meisten "make my furniture"-Projekte bietet einfache Holzverbindungstechnik ausreichend Stabilität. Verstärken Sie Ecken bei Bedarf mit Winkeln für zusätzliche Stabilität.
Wenn Sie eine Fehlstellung feststellen, klopfen Sie die Teile vorsichtig in Position oder justieren Sie sie nach Bedarf. Sorgfältige Montage sorgt dafür, dass Ihre fertigen Möbel stabil und langlebig sind.
Schritt 6: Schleifen und Finish
Schleifen Sie vor dem Finish alle Oberflächen gründlich. Beginnen Sie mit grobem Schleifpapier und arbeiten Sie sich zu feineren Körnungen vor, um eine glatte Oberfläche zu erhalten. Wischen Sie den Staub zwischen den Schleifphasen ab.
Tragen Sie die gewählte Oberfläche auf, wie z. B. Beize, Farbe oder Klarlack, und folgen Sie den Anweisungen des Herstellers. Verwenden Sie einen Pinsel oder Lappen für eine gleichmäßige Abdeckung. Mehrere dünne Schichten ergeben ein haltbareres und attraktiveres Ergebnis, ein Markenzeichen von Qualität in der "make my furniture"-Welt.
Zum Beispiel kann das Auftragen eines wasserbasierten Polyurethan-Finishs Ihren Tisch vor Verschüttungen schützen und ihm ein professionelles Aussehen verleihen. Lassen Sie jede Schicht vollständig trocknen, bevor Sie die nächste auftragen.
Schritt 7: Letzte Handgriffe und Installation
Der letzte Schritt Ihrer "make my furniture"-Reise ist das Anbringen der Beschläge und das Platzieren Ihres Möbelstücks. Montieren Sie Griffe, Füße oder Scharniere nach Bedarf und stellen Sie sicher, dass alle Befestigungen sicher sind.
Überprüfen Sie die Stabilität, indem Sie die Möbel sanft wackeln und lose Verbindungen festziehen. Stellen Sie Ihr neues Möbelstück an seinem vorgesehenen Platz auf und dekorieren Sie es mit Ihrer Lieblingsdekoration.
Nehmen Sie sich einen Moment, um Ihre Arbeit zu bewundern. Das Fertigstellen eigener Möbel verleiht Ihrem Zuhause nicht nur Charakter, sondern stärkt auch Ihr Selbstvertrauen für zukünftige Projekte.
Fehleranalyse und häufige Fehler
Jedes "make my furniture"-Projekt bringt eine Lernkurve mit sich. Anfänger stoßen oft auf Rückschläge, aber das Verständnis häufiger Fehler und deren Behebung kann Herausforderungen in wertvolle Lektionen verwandeln. Betrachten Sie jedes Hindernis als Chance, Ihre Fähigkeiten zu verbessern und sicherere, professionellere Ergebnisse zu erzielen.
Vermeidung und Behebung von Messfehlern
Genaue Maße sind das Rückgrat jedes "make my furniture"-Projekts. Schon eine kleine Fehlberechnung kann dazu führen, dass Teile nicht passen oder wackeln. Verwenden Sie stets zuverlässige Werkzeuge wie ein Maßband oder einen Laserentfernungsmesser und überprüfen Sie jede Markierung vor dem Schneiden doppelt.
Häufige Fehler sind das Vertauschen von Zahlen, das falsche Ablesen von Einheiten oder das Überspringen der doppelten Kontrolle. Wenn Sie einen Fehler entdecken, prüfen Sie, ob das Teil gekürzt oder umfunktioniert werden kann. Manchmal kann ein Zierleistenstück oder Füllmaterial das Projekt retten. Für mehr zu sicherem und präzisem Messen lesen Sie Learn the Skills to be Safe für praktische Anleitungen.
Umgang mit Materialfehlern
Nicht jedes Holz oder Metall ist gleichwertig. Verbogene Bretter, Äste oder Dellen treten oft bei Anfängermaterialien auf und beeinträchtigen die Endqualität Ihres "make my furniture"-Projekts. Inspizieren Sie jedes Stück vor Beginn auf Risse, Spalten oder andere Mängel.
Wenn Sie einen Defekt finden, können Sie ihn möglicherweise umgehen, indem Sie ihn herausschneiden oder in einem weniger sichtbaren Bereich verwenden. Für kleinere Oberflächenfehler können Holzspachtel und Schleifen eine glatte Oberfläche schaffen. Sortieren Sie Materialien immer vor der Montage, um sicherzustellen, dass die besten Stücke dort verwendet werden, wo sie am wichtigsten sind.
Montageprobleme und Lösungen
Montageprobleme sind bei "make my furniture"-Projekten häufig, besonders wenn Teile nicht wie geplant ausgerichtet sind. Fehlplatzierte Löcher, unebene Beine oder lockere Verbindungen können die Stabilität und Optik Ihrer Möbel beeinträchtigen. Fügen Sie die Komponenten trocken zusammen, bevor Sie endgültig montieren, um Probleme frühzeitig zu erkennen.
Wenn etwas nicht passt, überprüfen Sie Ihre Maße und Winkel. Verstärken Sie schwache Verbindungen mit Halterungen oder Holzleim. Bei anhaltenden Ausrichtungsproblemen zerlegen Sie das Teil und korrigieren Sie es, bevor Sie weitermachen. Geduld und Liebe zum Detail machen den Unterschied für ein stabiles Ergebnis.
Oberflächen- und Lackprobleme
Eine makellose Oberfläche erweckt Ihr Möbelstück zum Leben, aber Tropfen, Blasen oder ungleichmäßige Schichten sind typische Herausforderungen. Schleifen Sie immer zwischen den Schichten und verwenden Sie den richtigen Pinsel oder Applikator für den gewählten Lack.
Wenn Sie Unvollkommenheiten entdecken, lassen Sie die Oberfläche vollständig trocknen, schleifen Sie leicht und tragen Sie eine weitere Schicht auf. Bei Blasen oder Streifen verdünnen Sie den Lack oder passen Ihre Auftragsmethode an. Ein glattes, professionelles Aussehen ist mit etwas zusätzlichem Aufwand und Sorgfalt in diesem Stadium möglich.
Motiviert bleiben trotz Rückschlägen
Rückschläge gehören zur Möbelbau-Reise, besonders für Anfänger. Frustration kann aufkommen, wenn Dinge nicht wie geplant laufen, aber Ausdauer ist entscheidend. Teilen Sie große Aufgaben in kleinere Schritte auf und feiern Sie Fortschritte unterwegs.
Vernetzen Sie sich online oder lokal mit DIY-Communities für Unterstützung und neue Ideen. Aus Fehlern zu lernen ist ein wesentlicher Teil des Wachstums. Denken Sie daran, jedes Projekt stärkt Ihr Selbstvertrauen und Ihre Fähigkeiten, sodass das nächste reibungsloser und lohnender wird.
Lernressourcen und nächste Schritte
Ihre Fähigkeiten zu entwickeln ist genauso wichtig wie Ihre Möbel zu bauen. Ob Sie Ihr Wissen erweitern, sich mit Gleichgesinnten vernetzen oder die nächste Stufe auf Ihrer Möbelbau-Reise erkunden möchten – es gibt unzählige Ressourcen, die Sie anleiten. So nutzen Sie die Lernlandschaft im Jahr 2025 optimal.
Online-Kurse und Tutorials für Möbelbau
Online-Lernplattformen haben die Herangehensweise von Anfängern an den Prozess des Möbelbauens revolutioniert. Im Jahr 2025 finden Sie Schritt-für-Schritt-Video-Tutorials, interaktive Workshops und selbstgesteuerte Kurse von renommierten Seiten wie Skillshare, Coursera und YouTube-Kanälen, die sich dem DIY-Möbelbau widmen.
Diese Ressourcen decken alles ab, von der grundlegenden Werkzeughandhabung bis hin zu fortgeschrittener Verleimung. Suchen Sie nach Kursen mit klaren Projektaufteilungen, herunterladbaren Plänen und Feedback von Lehrern. Viele Plattformen bieten Community-Foren, in denen Sie Fragen stellen und Ihren Fortschritt teilen können, sodass Sie auf Ihrer Reise nie allein sind.
Bücher, Magazine und gedruckte Anleitungen
Traditionelle Ressourcen bleiben für alle, die meine Möbel zu Hause herstellen möchten, von unschätzbarem Wert. Umfassende Bücher und Magazine bieten grundlegendes Wissen, detaillierte Diagramme und zeitlose Techniken.
Einige empfohlene Titel sind "The Complete Manual of Woodworking" und "Furniture Making for Beginners." Magazine wie "Fine Woodworking" bieten monatliche Inspiration und Tipps. Für diejenigen, die sich für Aufbewahrungs- oder Schrankprojekte interessieren, kann das Durchstöbern der Interior Cabinet Collection Ideas Kreativität mit praxisnahen Beispielen und innovativen Designs wecken.
Gedruckte Anleitungen sind perfekt zum Nachschlagen in Ihrer Werkstatt und ermöglichen es Ihnen, Schritt für Schritt ohne digitale Ablenkungen zu folgen.
Community-Gruppen und Makerspaces
Der Austausch mit anderen, die Ihre Leidenschaft für die "make my furniture"-Bewegung teilen, kann Ihr Lernen beschleunigen. Lokale Makerspaces bieten oft Zugang zu professionellen Werkzeugen, Expertenrat und praktischen Workshops.
Online-Communities, wie spezielle Subreddits oder Facebook-Gruppen, bieten eine Plattform, um Fortschritte zu teilen, Probleme zu lösen und abgeschlossene Projekte zu feiern. Die Teilnahme an Gruppenbauprojekten oder Treffen kann Sie neuen Techniken aussetzen und ein Gefühl der Kameradschaft fördern. Makerspaces, sowohl virtuell als auch physisch, sind für alle Fähigkeitsstufen wertvoll.
Verbesserung Ihrer Fähigkeiten: Mittelstufe und fortgeschrittene Techniken
Sobald Sie die Grundlagen gemeistert haben, geht die Reise "make my furniture" mit fortgeschrittenen Fähigkeiten weiter. Erkunden Sie Techniken wie Zapfen- und Lochverbindungen, dekorative Intarsien oder sogar Polsterarbeiten.
Viele Werkstätten und Online-Plattformen bieten Kurse für Fortgeschrittene und Experten an. Wenn Ihr Selbstvertrauen wächst, sollten Sie komplexere Entwürfe angehen, mit neuen Materialien experimentieren oder Technologien wie smarte Funktionen in Ihre Möbel integrieren. Das Dokumentieren Ihres Fortschritts hilft, das Wachstum zu verfolgen und inspiriert andere.
Nachhaltige und umweltfreundliche Praktiken
Umweltverantwortung ist ein Grundprinzip für viele, die sich entscheiden, meine Möbel zu machen. Ziehen Sie in Betracht, wiederverwendetes Holz, recycelte Metalle oder ökozertifizierte Materialien in Ihren Projekten zu verwenden. Entscheiden Sie sich für ungiftige Oberflächenbehandlungen und Klebstoffe, um ein gesünderes Wohnumfeld zu gewährleisten.
Abfall zu reduzieren, indem man Schnitte effizient plant und Verschnitt wiederverwendet, kann ebenfalls einen großen Unterschied machen. Die Unterstützung lokaler Lieferanten und nachhaltiger Marken kommt nicht nur dem Planeten zugute, sondern bereichert auch Ihr Handwerkerlebnis. Während Sie lernen und wachsen, machen Sie Nachhaltigkeit zu einem natürlichen Teil Ihres Arbeitsablaufs.
Jetzt, da Sie die Grundlagen des Entwerfens und Bauens eigener Möbel erkundet haben, können Sie sehen, wie zugänglich und lohnend diese Reise sein kann – selbst als kompletter Anfänger. Ob Sie nun Ideen entwickeln oder nach praktischen Wegen suchen, diese zum Leben zu erwecken, die richtigen Werkzeuge und Anleitungen machen den entscheidenden Unterschied. Wenn Sie bereit sind, den nächsten Schritt zu gehen und mit professionellen Ressourcen einen Vorsprung haben möchten, können Sie lernen, wie man Möbelentwürfe einfach mit vorgefertigten 3D-CAD-Modellen erstellt. Schauen Sie sich diesen hilfreichen Leitfaden an: Erfahren Sie, wie Sie Möbelentwürfe mit vorgefertigten 3D-CAD-Modellen erstellen


Aktie:
Innenarchitektur-Leitfaden: Ihr kreativer Bauplan für 2025
Innenraum-Stile: 9 erstaunliche verschiedene Stile, die Sie 2025 ausprobieren können