THE DESIGN KEY SERIES
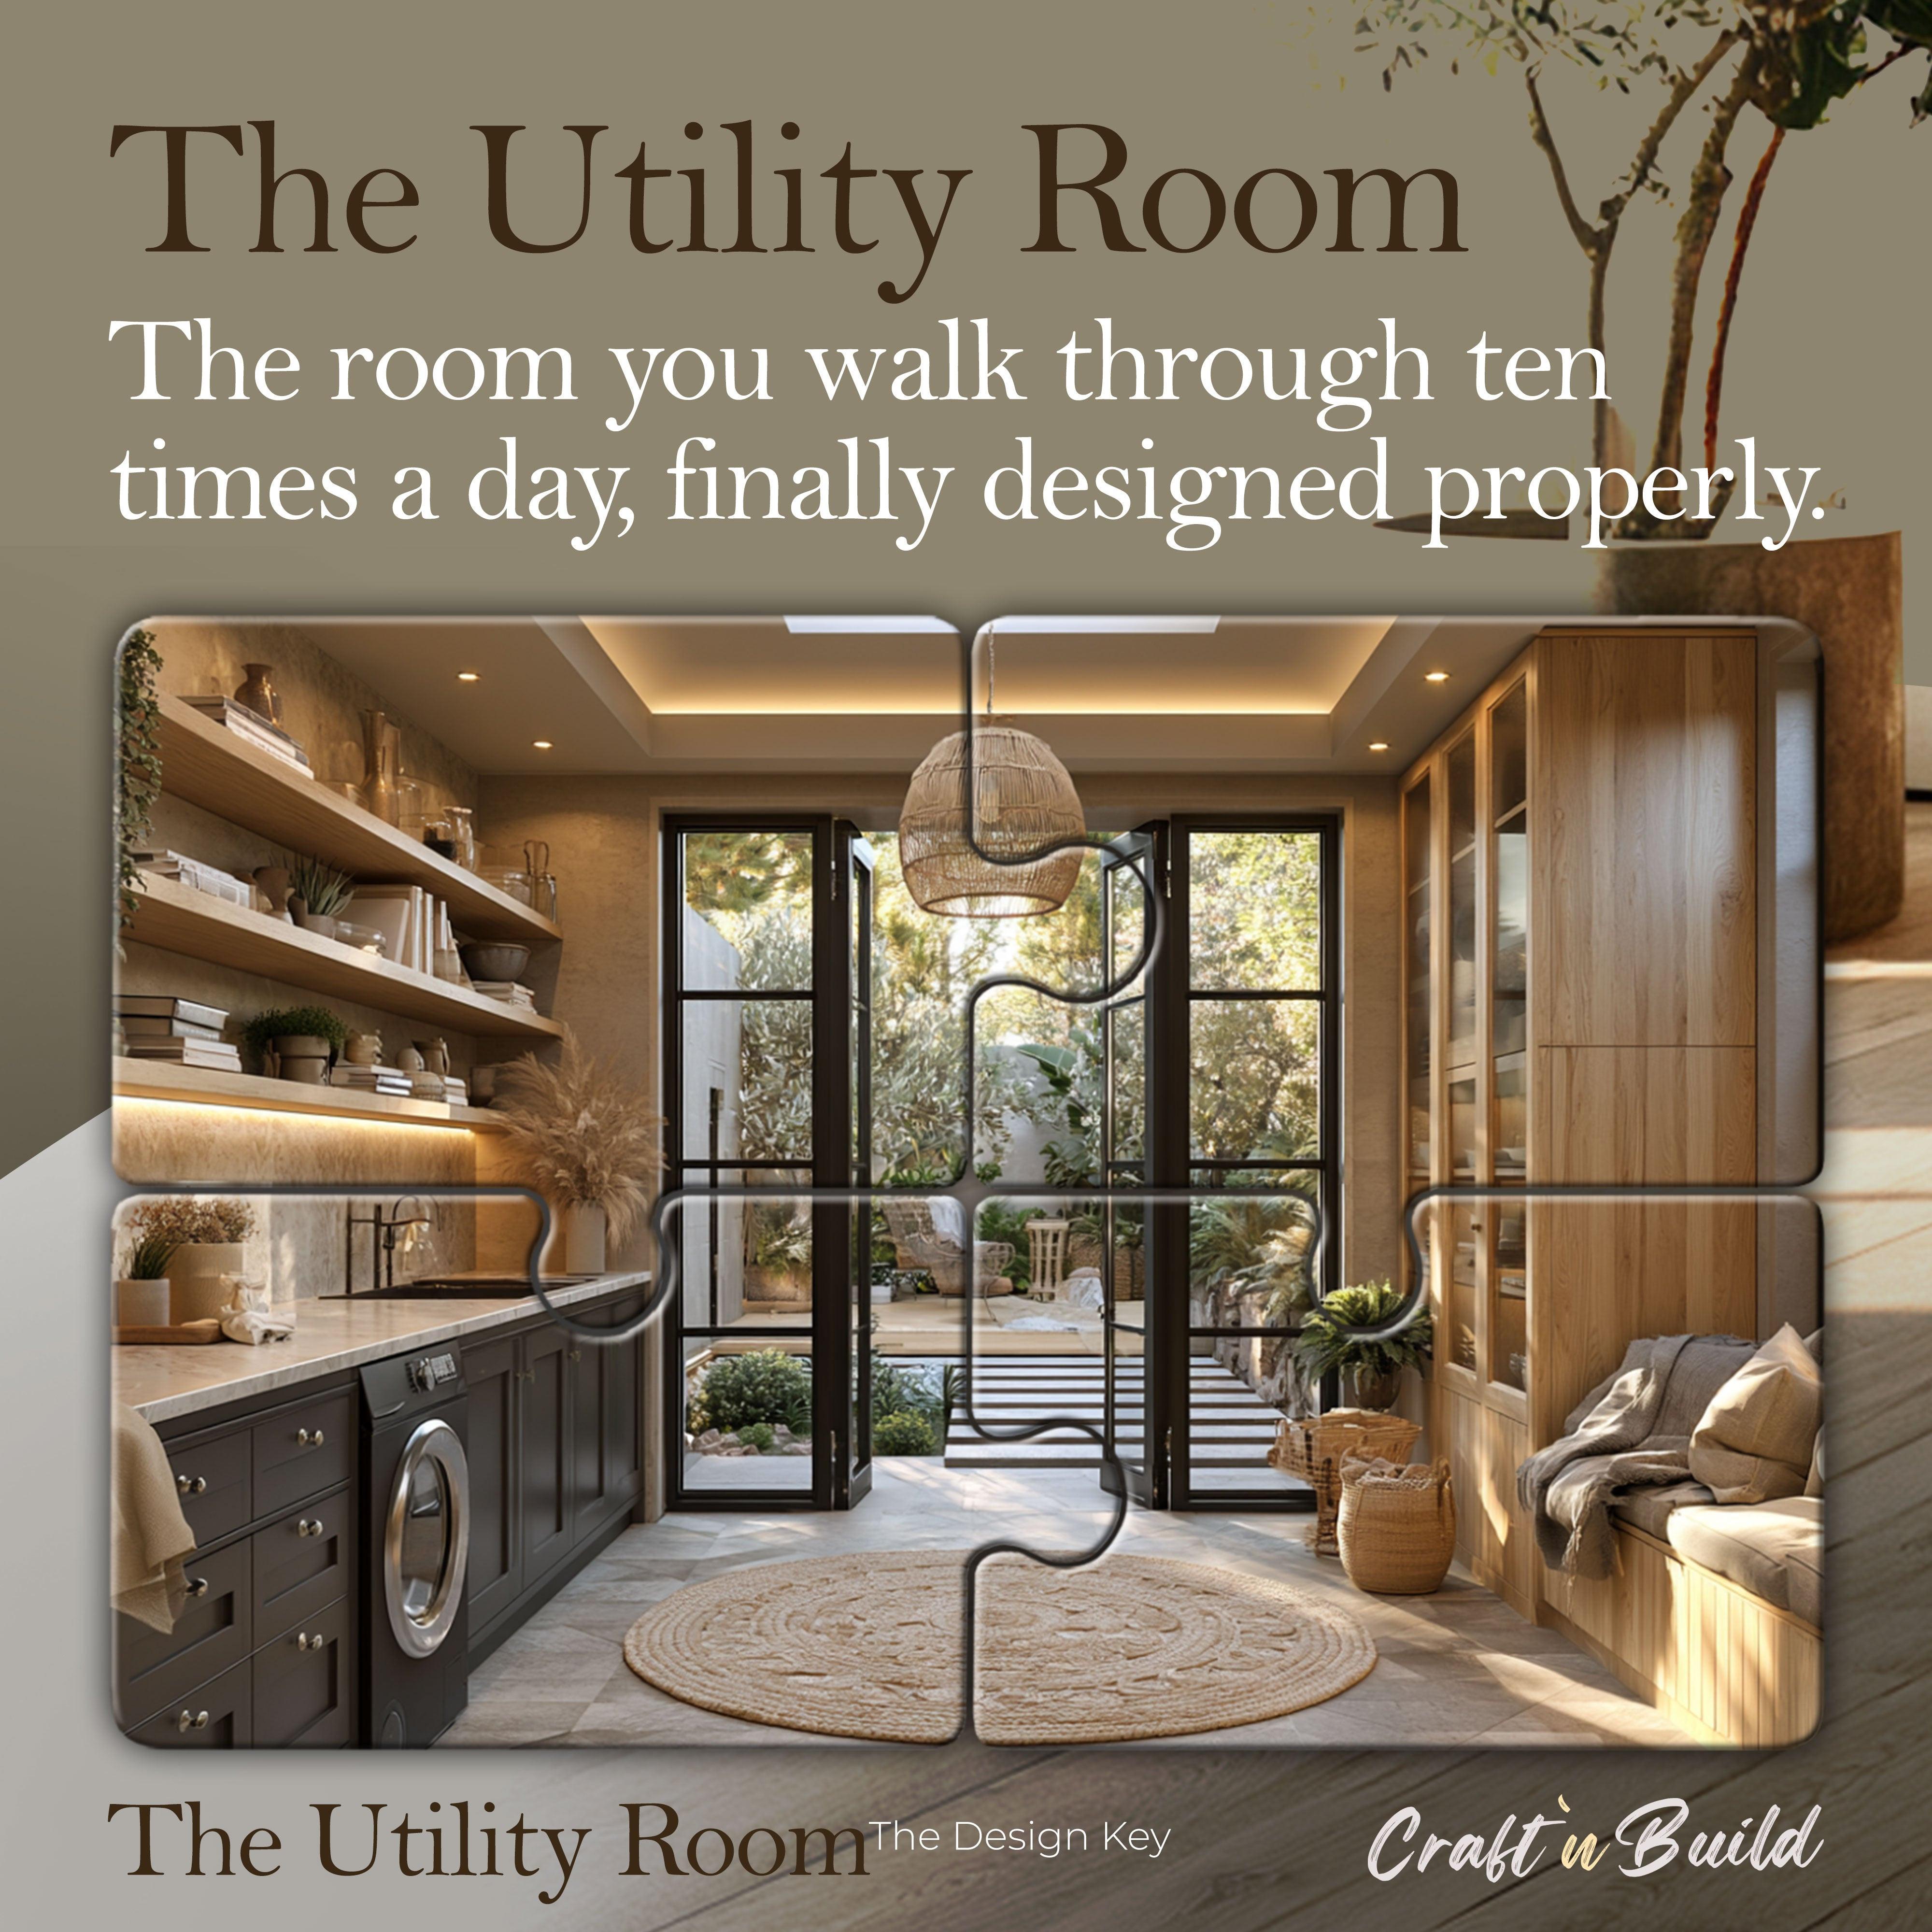
The Utility Room

Secure checkout — all major payment methods accepted
The Design Key — Master Programme
1 of 12 courses toward the Master Programme. Every course counts.Every single course counts towards the full Master Programme.
Pairs well with
What You'll Learn
-
Settle the systems before you place a single fitting
-
Plan the room around the work, not the machines
-
Stop the damp before it reaches the rest of the house
-
Make it work at any size, from villa room to cupboard
-
Draw the line between the dirty side and the welcome
-
Turn surfaces into a schedule a contractor can build
Four starting points — one method.
Who is this course for

Working designers
Put a repeatable method under the instinct you already have, and sharpen the process you use every day.

Aspiring designers
Build real professional skills from the ground up. No degree, no prior experience needed.

Project owners
Understand the process well enough to brief sharply, judge the work, and manage the people delivering it.

Homeowners
Approach your own space the way a professional would, and stop guessing on decisions that cost real money.
No credentials required. No experience assumed. Just a commitment to learn how design actually works — because the method is the same for all of you.
How to get the most from this course
Four steps to turn watching into doing.
Set up to work, not just watch
Have pen and paper beside you. This is a course you do, not one you passively watch — the method only sticks when you work it by hand.

Have pen and paper beside you. This is a course you do, not one you passively watch — the method only sticks when you work it by hand.
Take one module at a time
Each module is a complete idea. Work through one per sitting, finish its exercise before moving on, and let it settle rather than racing to the end.

Apply it to a real space as you go
Use your own home, a past project, or an imagined brief. Run each method on something real so it becomes a skill, not just notes.

Expect about a week, at your pace
Most people complete a course in around a week at a relaxed module-a-day rhythm — faster if you push, slower if you savour it. There's no clock; lifetime access means you set the speed.

See the actual work
Not slides. Not tips. These are real pages from inside the courses — the kind of professional documentation The Design Key teaches you to produce.
01
The Brief
Every project begins by defining what it actually is. The Brief teaches the four-dimension framework that stops a project breaking down before it's finished — documented the way a working studio does it.

02
The Moodboard
The difference between a professional moodboard and a Pinterest board, made explicit. You learn to build a strategic visual document that directs a project — not a folder of images you happen to like.

03
The Lighting
Light designed as a system, not chosen as a fixture. The Lighting teaches you to read how daylight enters a room hour by hour, and to plan an artificial scheme that works with it instead of fighting it.

04
The Kitchen
Where the method meets millimetres. The Kitchen takes you into real fabrication-level decisions — joint placement, material limits, service coordination — the technical depth that separates a finished room from a styled one.

FAQ
What is "The Design Key"?
The Design Key is a series of professional methodology courses from Craft'n Build, each covering one core discipline of interior design — the Brief, the Mood Board, the Floor Plan, Lighting, the Kitchen, and more. It teaches how working designers actually think, plan and execute, through the same rigorous framework used in real practice. It's about method, not aesthetics or inspiration.
Who is this for?
Anyone who wants to learn professional interior design method, whatever their starting point — working designers, students and career-changers, homeowners approaching their own space properly, and project owners who need to brief and judge the work. No credentials or prior experience required. The method is the same for everyone.
What do I get, and how do I access it?
Everything is online and yours the moment you buy — instant access, no waiting, nothing shipped. You watch the course in your browser on any device and download the accompanying course material to keep. Access doesn't expire.
Is the course video, text, or both?
Both. Each course combines video lessons with a downloadable written guide and practical exercises, so you can watch, read, and work through the method by hand — which is how it's designed to be learned.
Do I need any experience or special software?
No. The courses assume no prior experience and no expensive software — just a willingness to work through the method. Where a tool is useful, the course shows you accessible options. The method matters more than the software.
How long do I have to complete a course?
As long as you like — access is for life, with no deadline. Most people work through a course in about a week at a relaxed module-a-day pace, faster if they push. You set the speed and can return to the material whenever you need it.
Do I get a certificate?
Yes. Complete any course and you earn a Certificate for that discipline. Complete all twelve and pass the final synthesis exam — which tests your ability to solve real problems across several disciplines at once — and you earn the Design Key Diploma, a credential that reflects mastery of the whole method, not just course completion.
What is "The Master Programme"?
The Master Programme is the full path: all twelve courses together, leading to the Design Key Diploma. You don't commit up front — every single course you take counts toward it. Start with one; the whole programme stays open to you.
Can I just buy one course, or do I have to take the whole series?
Start with a single course — most people do. There's no obligation to take more, but everything you complete counts toward the Master Programme and the Diploma, so a single course is also a first step if you decide to go further.
Do you offer a refund?
Yes — if a course isn't right for you, contact us and we'll make it right.
THE DESIGN KEY
About the Programme

Start with one course
Learn a complete discipline — the Brief, the Mood Board, a room — and earn its Certificate. One course is a real skill on its own.

Build toward the whole
Every course you complete counts toward the Master Programme. You're never starting over — always adding to the same path.

Earn the Diploma
Complete all twelve and pass the synthesis exam to earn the Design Key Diploma — proof you can integrate the whole method, not just finish the courses.
The Design Key Master Programme

€75,95


€75,95


€75,95

€75,95


€75,95


€75,95


€75,95


€75,95

€75,95


€75,95


€75,95


€75,95
The Design Key — Master Programme
1 of 12 courses toward the Master Programme. Every course counts.Every single course counts towards the full Master Programme.
Description
Short description
Full description
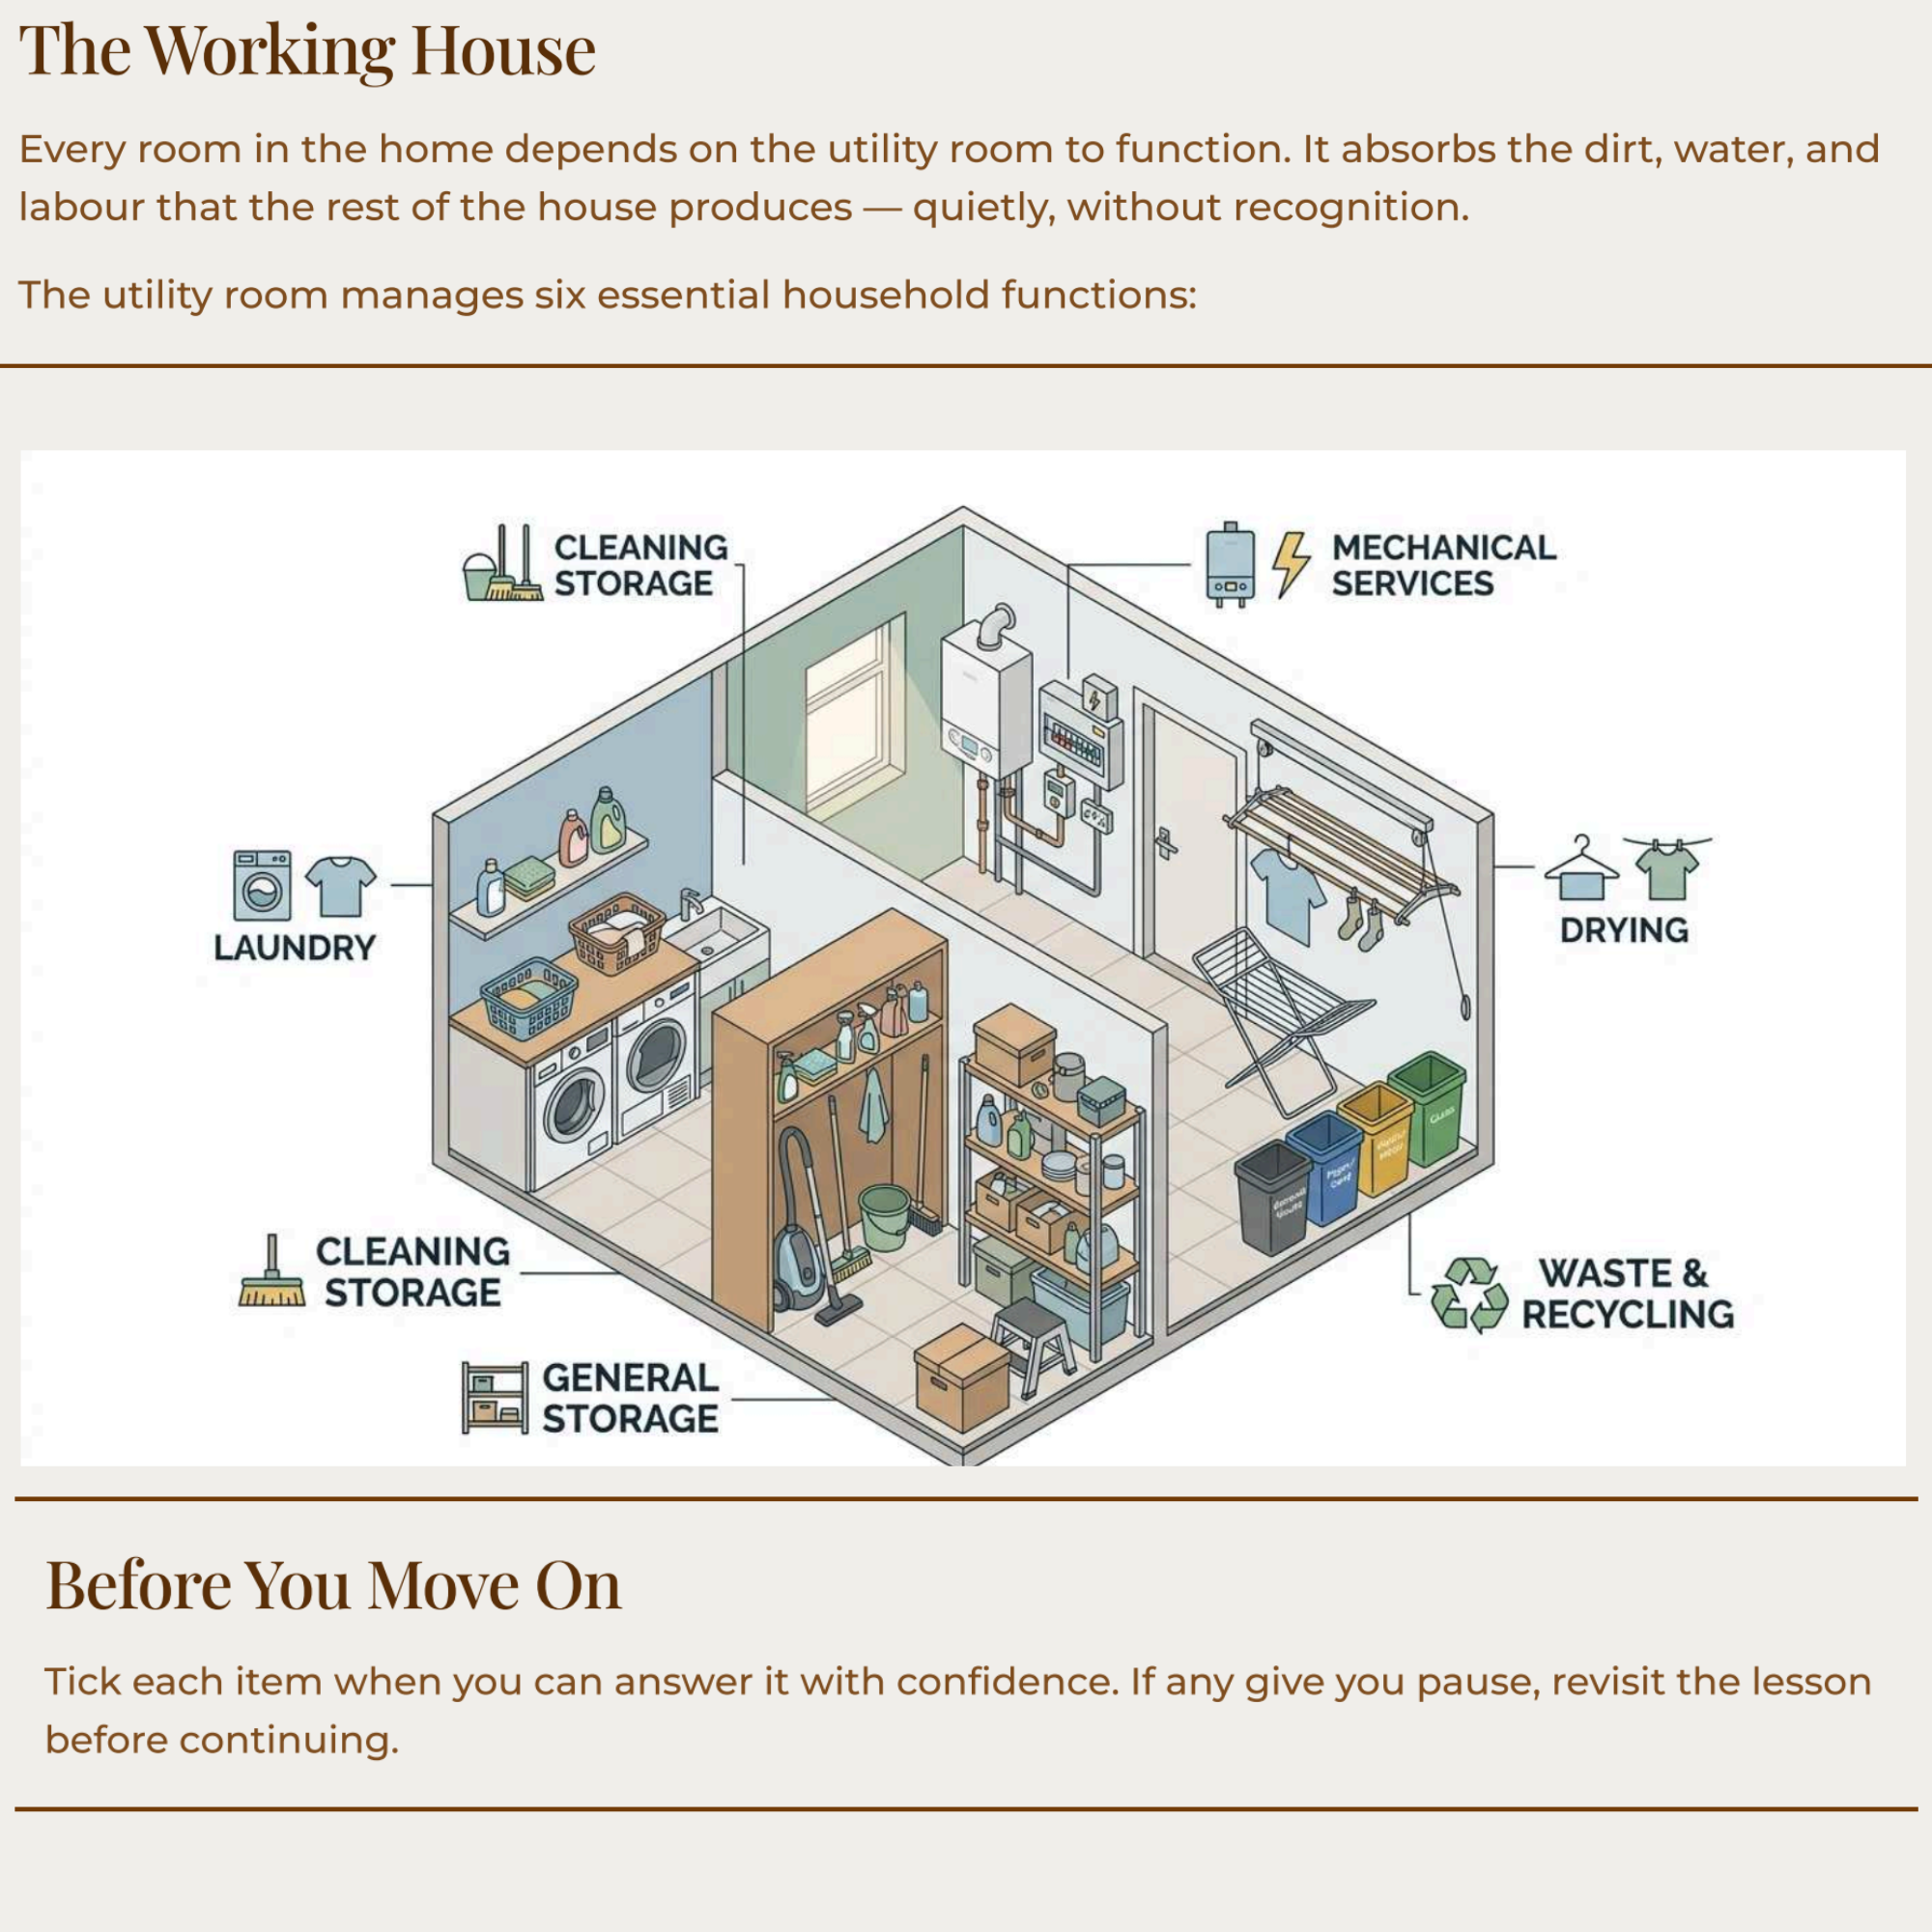
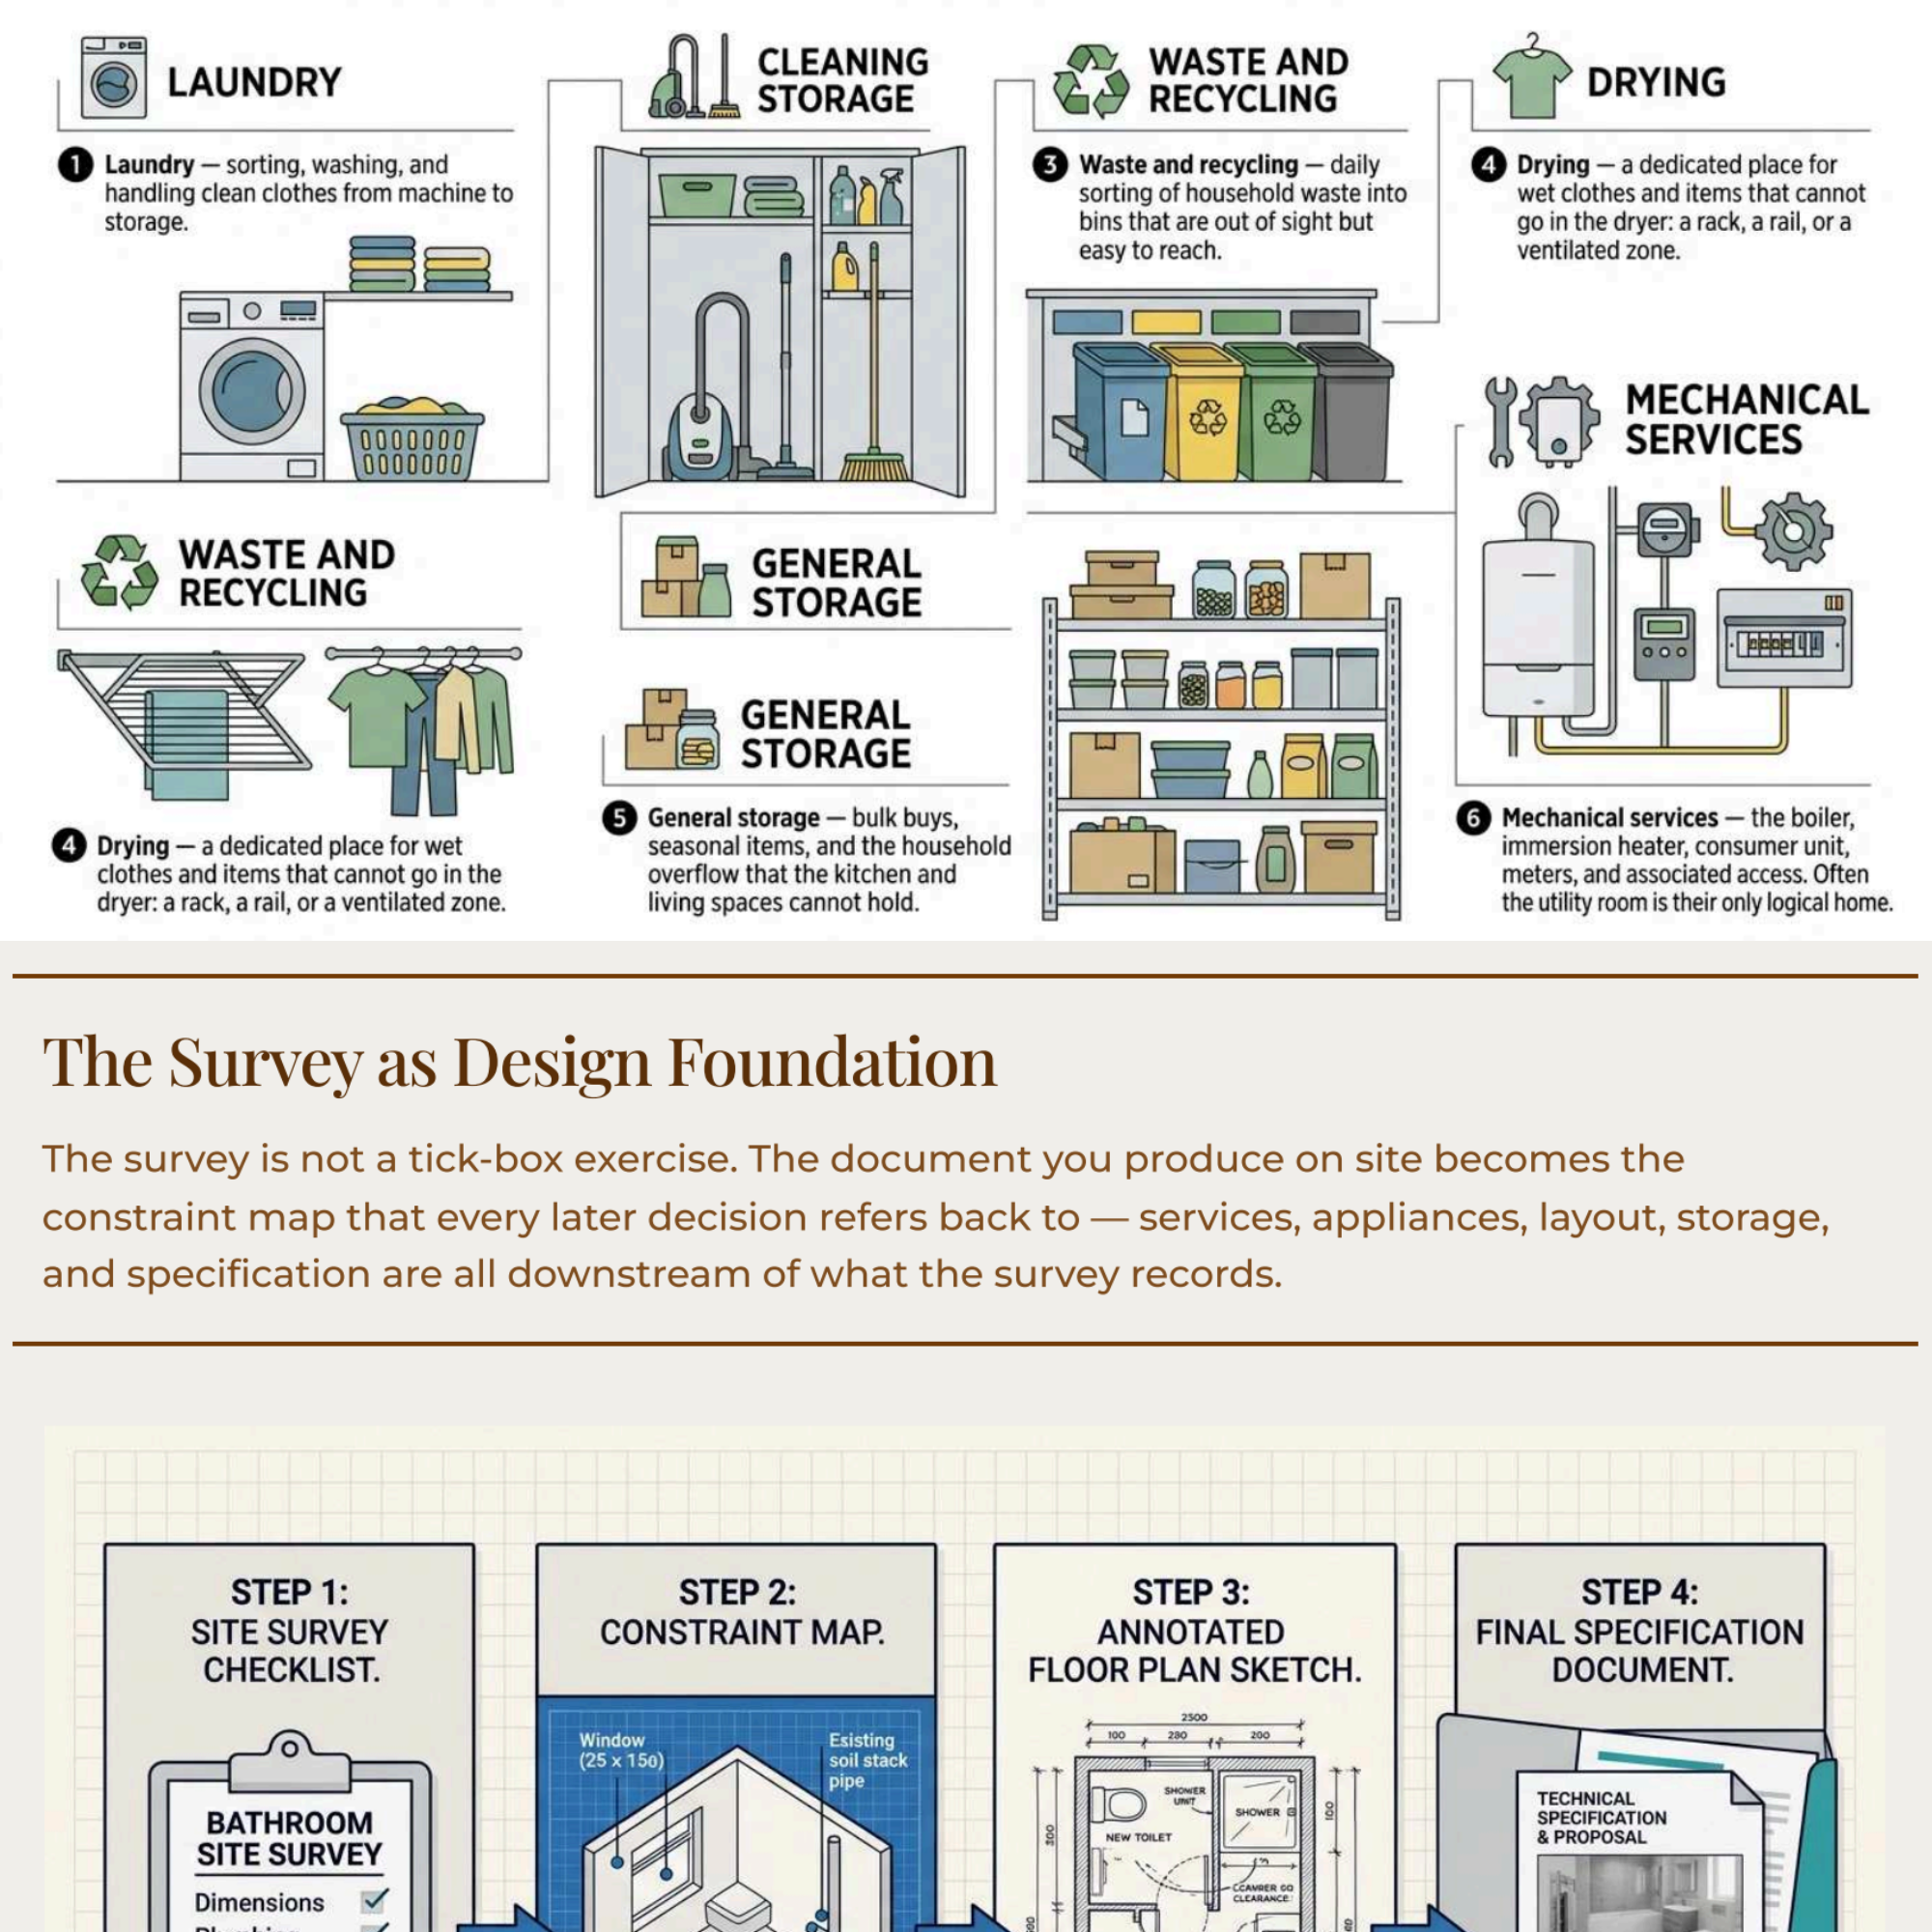
The Design Key — The Utility Room is a professional interior design course that teaches how to design a utility or laundry room — the working house that manages laundry, cleaning, waste, drying, storage, and the home's mechanical services. It uses a systems-first method: survey the existing services, build a brief from the household's workload, resolve water, drainage, power, ventilation, and heat before any fitting is placed, then plan the room around the work that flows through it and specify it for years of hard use. The course treats the dedicated villa room and the compressed apartment cupboard as one discipline at different scales. It is six modules and twenty-nine lessons with lifetime access, earning a Course Certificate toward The Design Key Master Programme.
The utility room is the room a home cannot do without and rarely designs on purpose. A kitchen gets months of attention; a bathroom gets a mood board. The utility room gets whatever space is left over — and then it is asked to wash the family's clothes, dry them, store the cleaning equipment, sort the recycling, hide the boiler, and often serve as the back door used every single day. It is the engine room of the house, and most homes treat it as a closet.
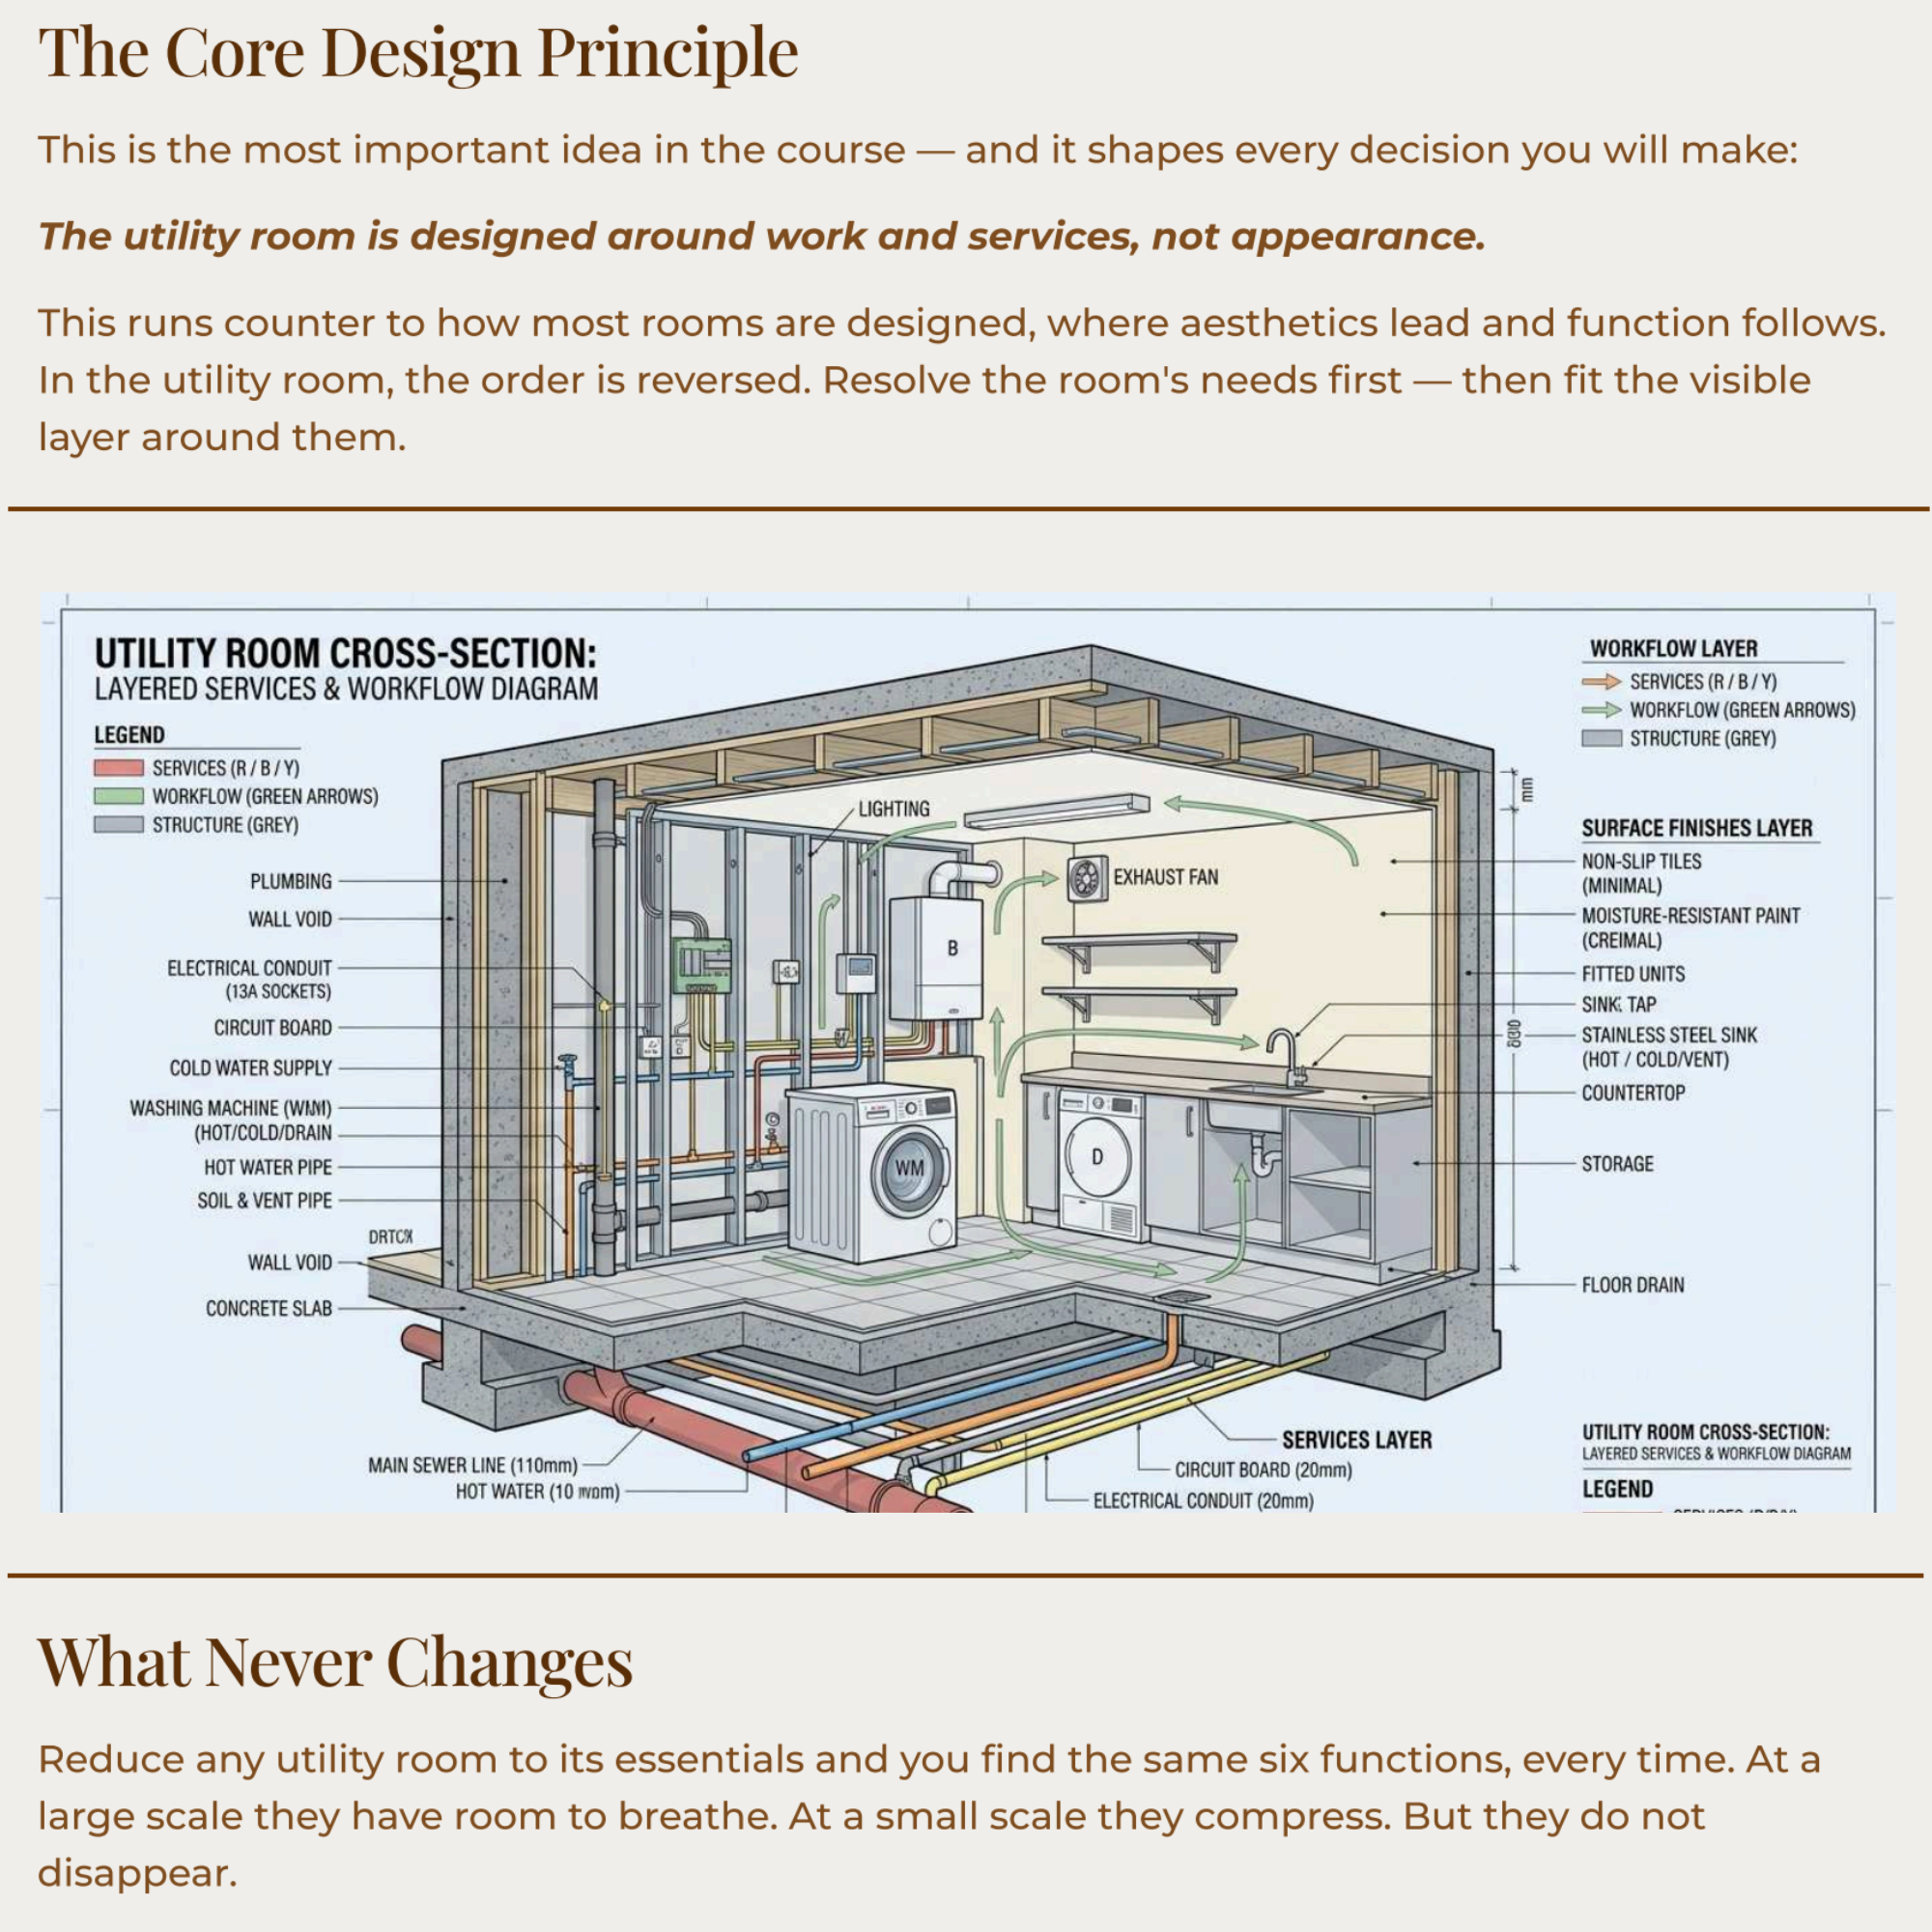
This course treats it as a discipline. The skill it teaches is not decoration but resolution: getting the services, the workflow, and the durability right so that the hardest-working room in the home actually works, quietly, for years.
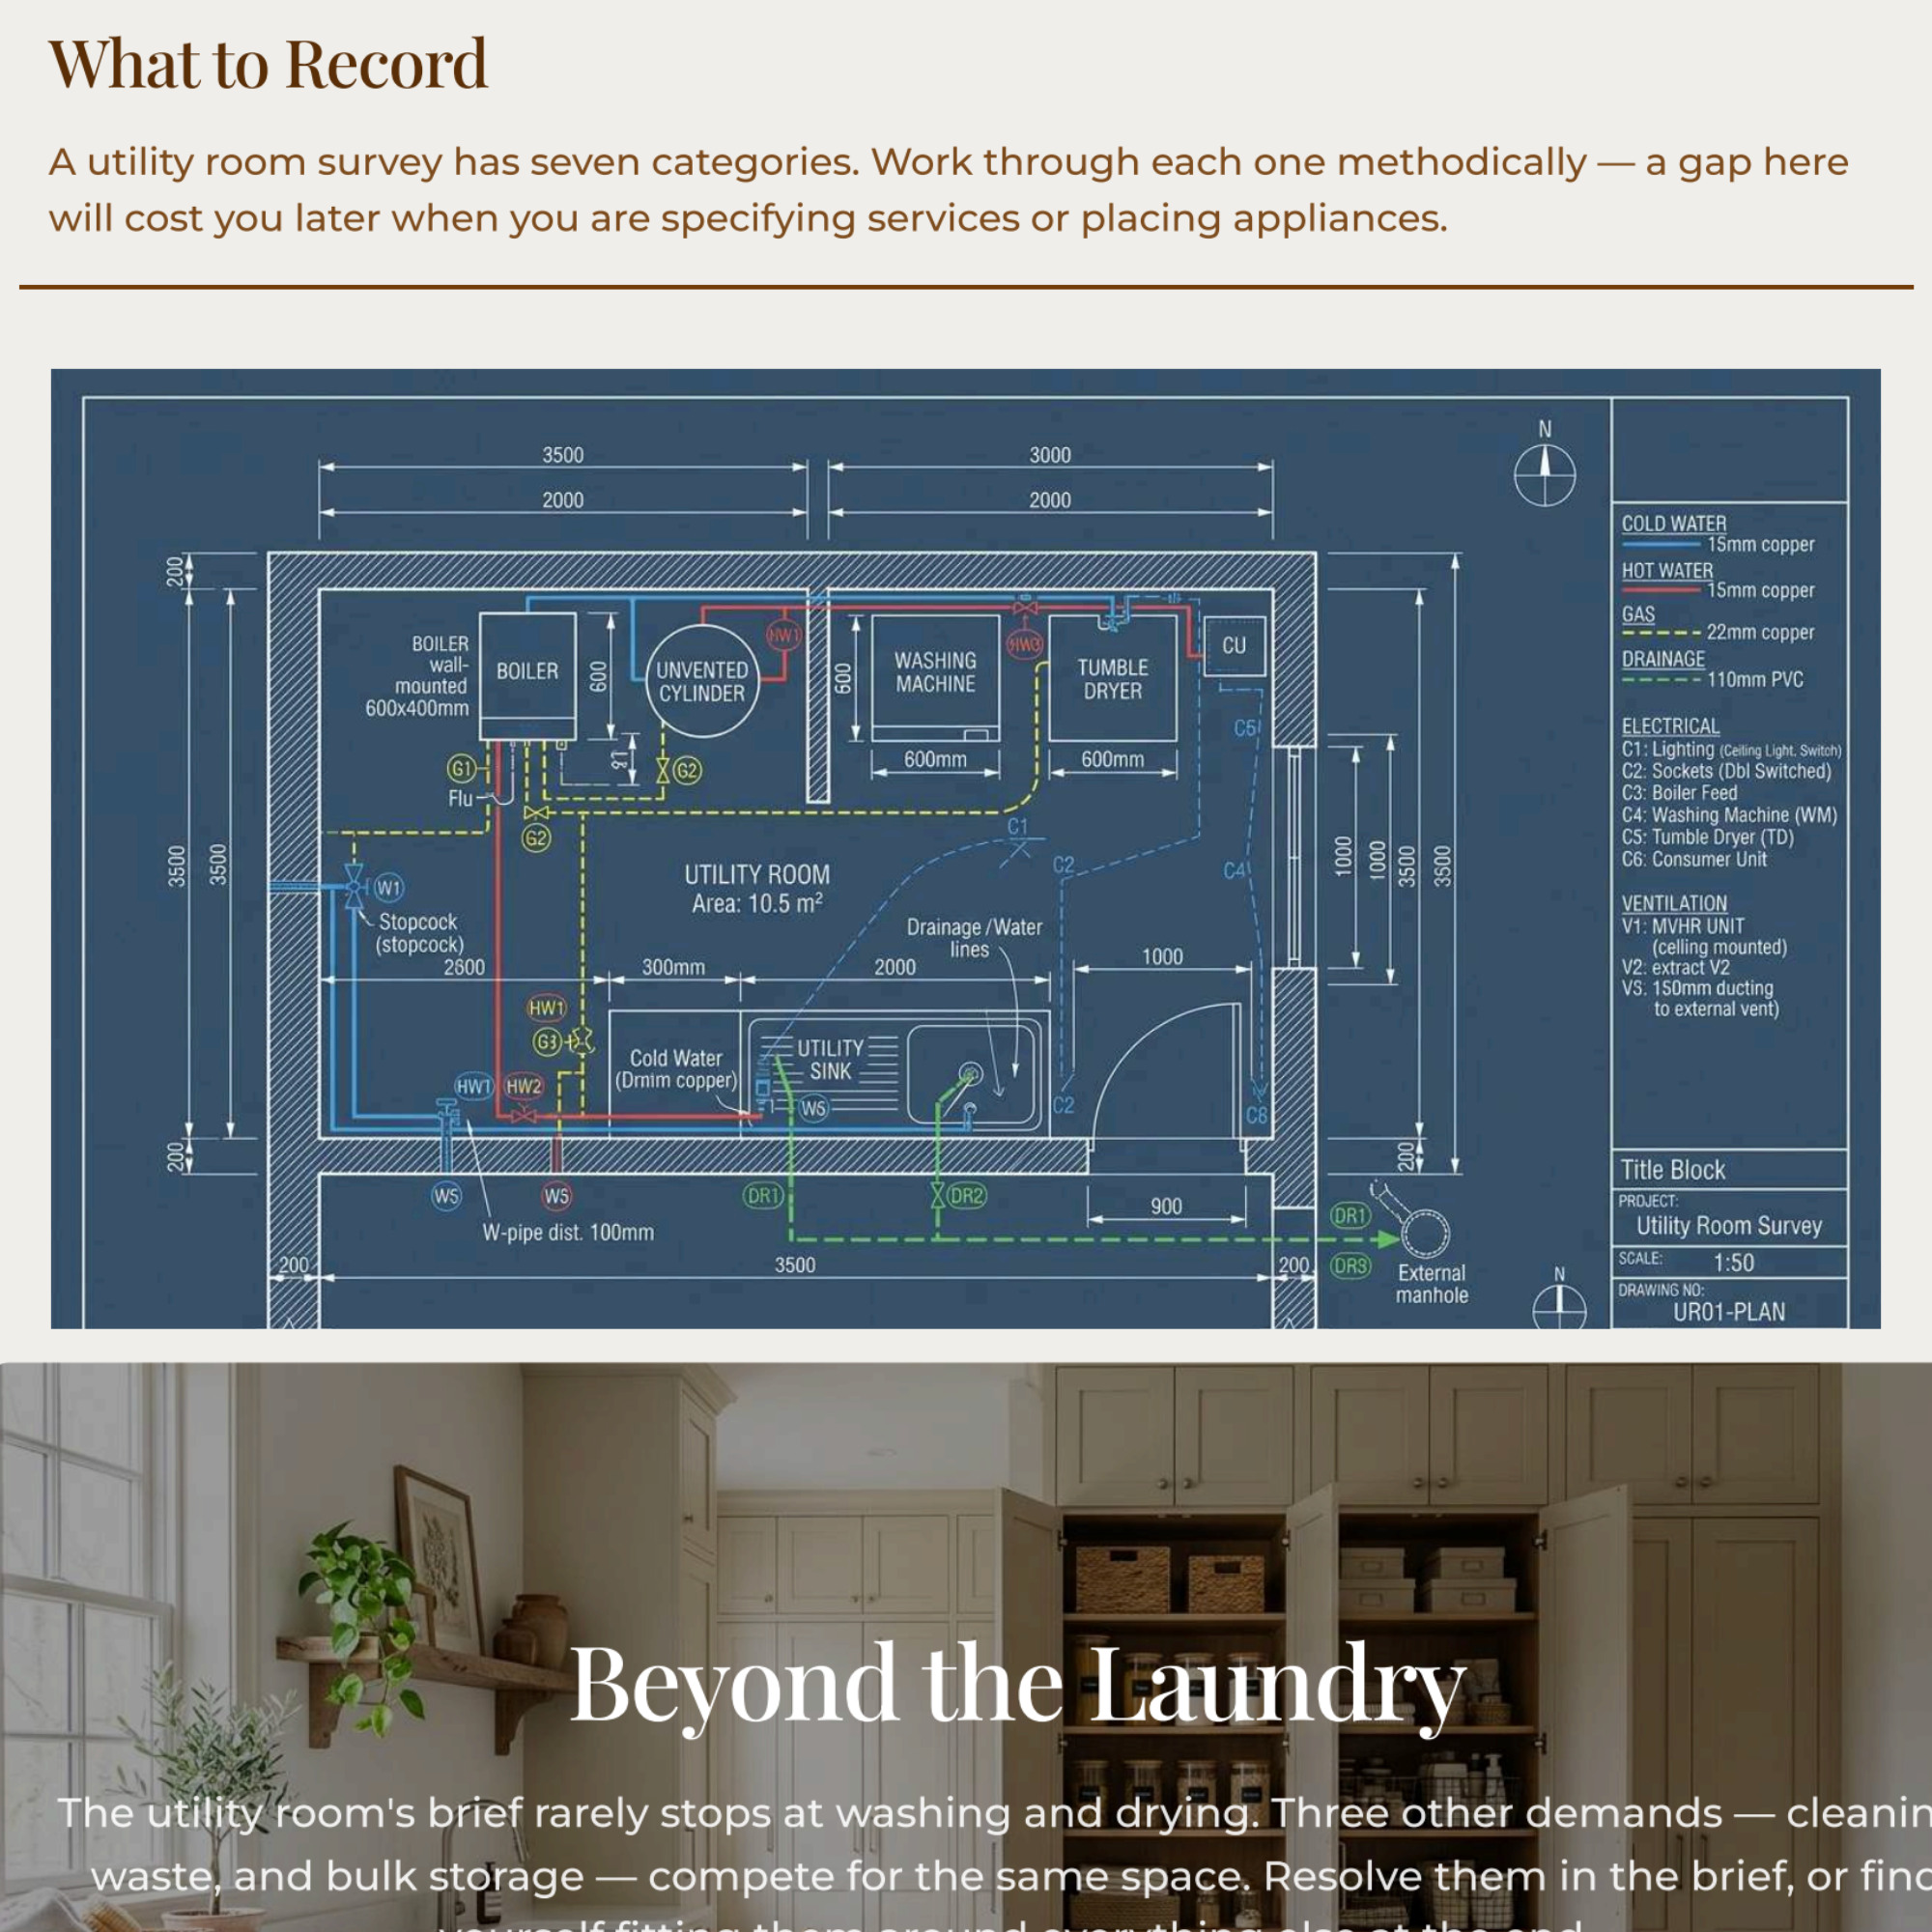
Because the utility room is wet and serviced, it follows the same order as the kitchen and the bathroom, where decisions made in the wrong sequence are the most expensive to undo. You begin by surveying the existing space — its water supply and drainage, electrical capacity, ventilation, heat sources, and the location of the home's mechanical services. You build a brief from the work the household genuinely does: how much laundry, how often, how many people, pets, sport, and outdoor life. Then you resolve the systems. Water and drainage for the washing machines and the utility sink. Dedicated circuits for high-draw appliances. Ventilation and moisture control — because a room that dries laundry generates humidity that will damage the house if it has nowhere to go. A drying strategy that suits the household. And a proper home for the boiler, cylinder, consumer unit, and meters that so often share the space.
Only once the services are settled do you plan the visible room. You design the laundry workflow as a sequence of stations — sort, wash, dry, fold, store — so the work moves without backtracking, the way a kitchen is planned around cooking. You place the appliances, the sink, and the worktop at workable heights. You give cleaning equipment, waste, and recycling proper, contained homes instead of letting them spill into the kitchen and hallway. Then you specify a material envelope built to take water, dirt, and constant use: floors that survive being wet, walls and worktops that wipe clean, lighting bright enough for close work, and details that stay hygienic and serviceable for years.
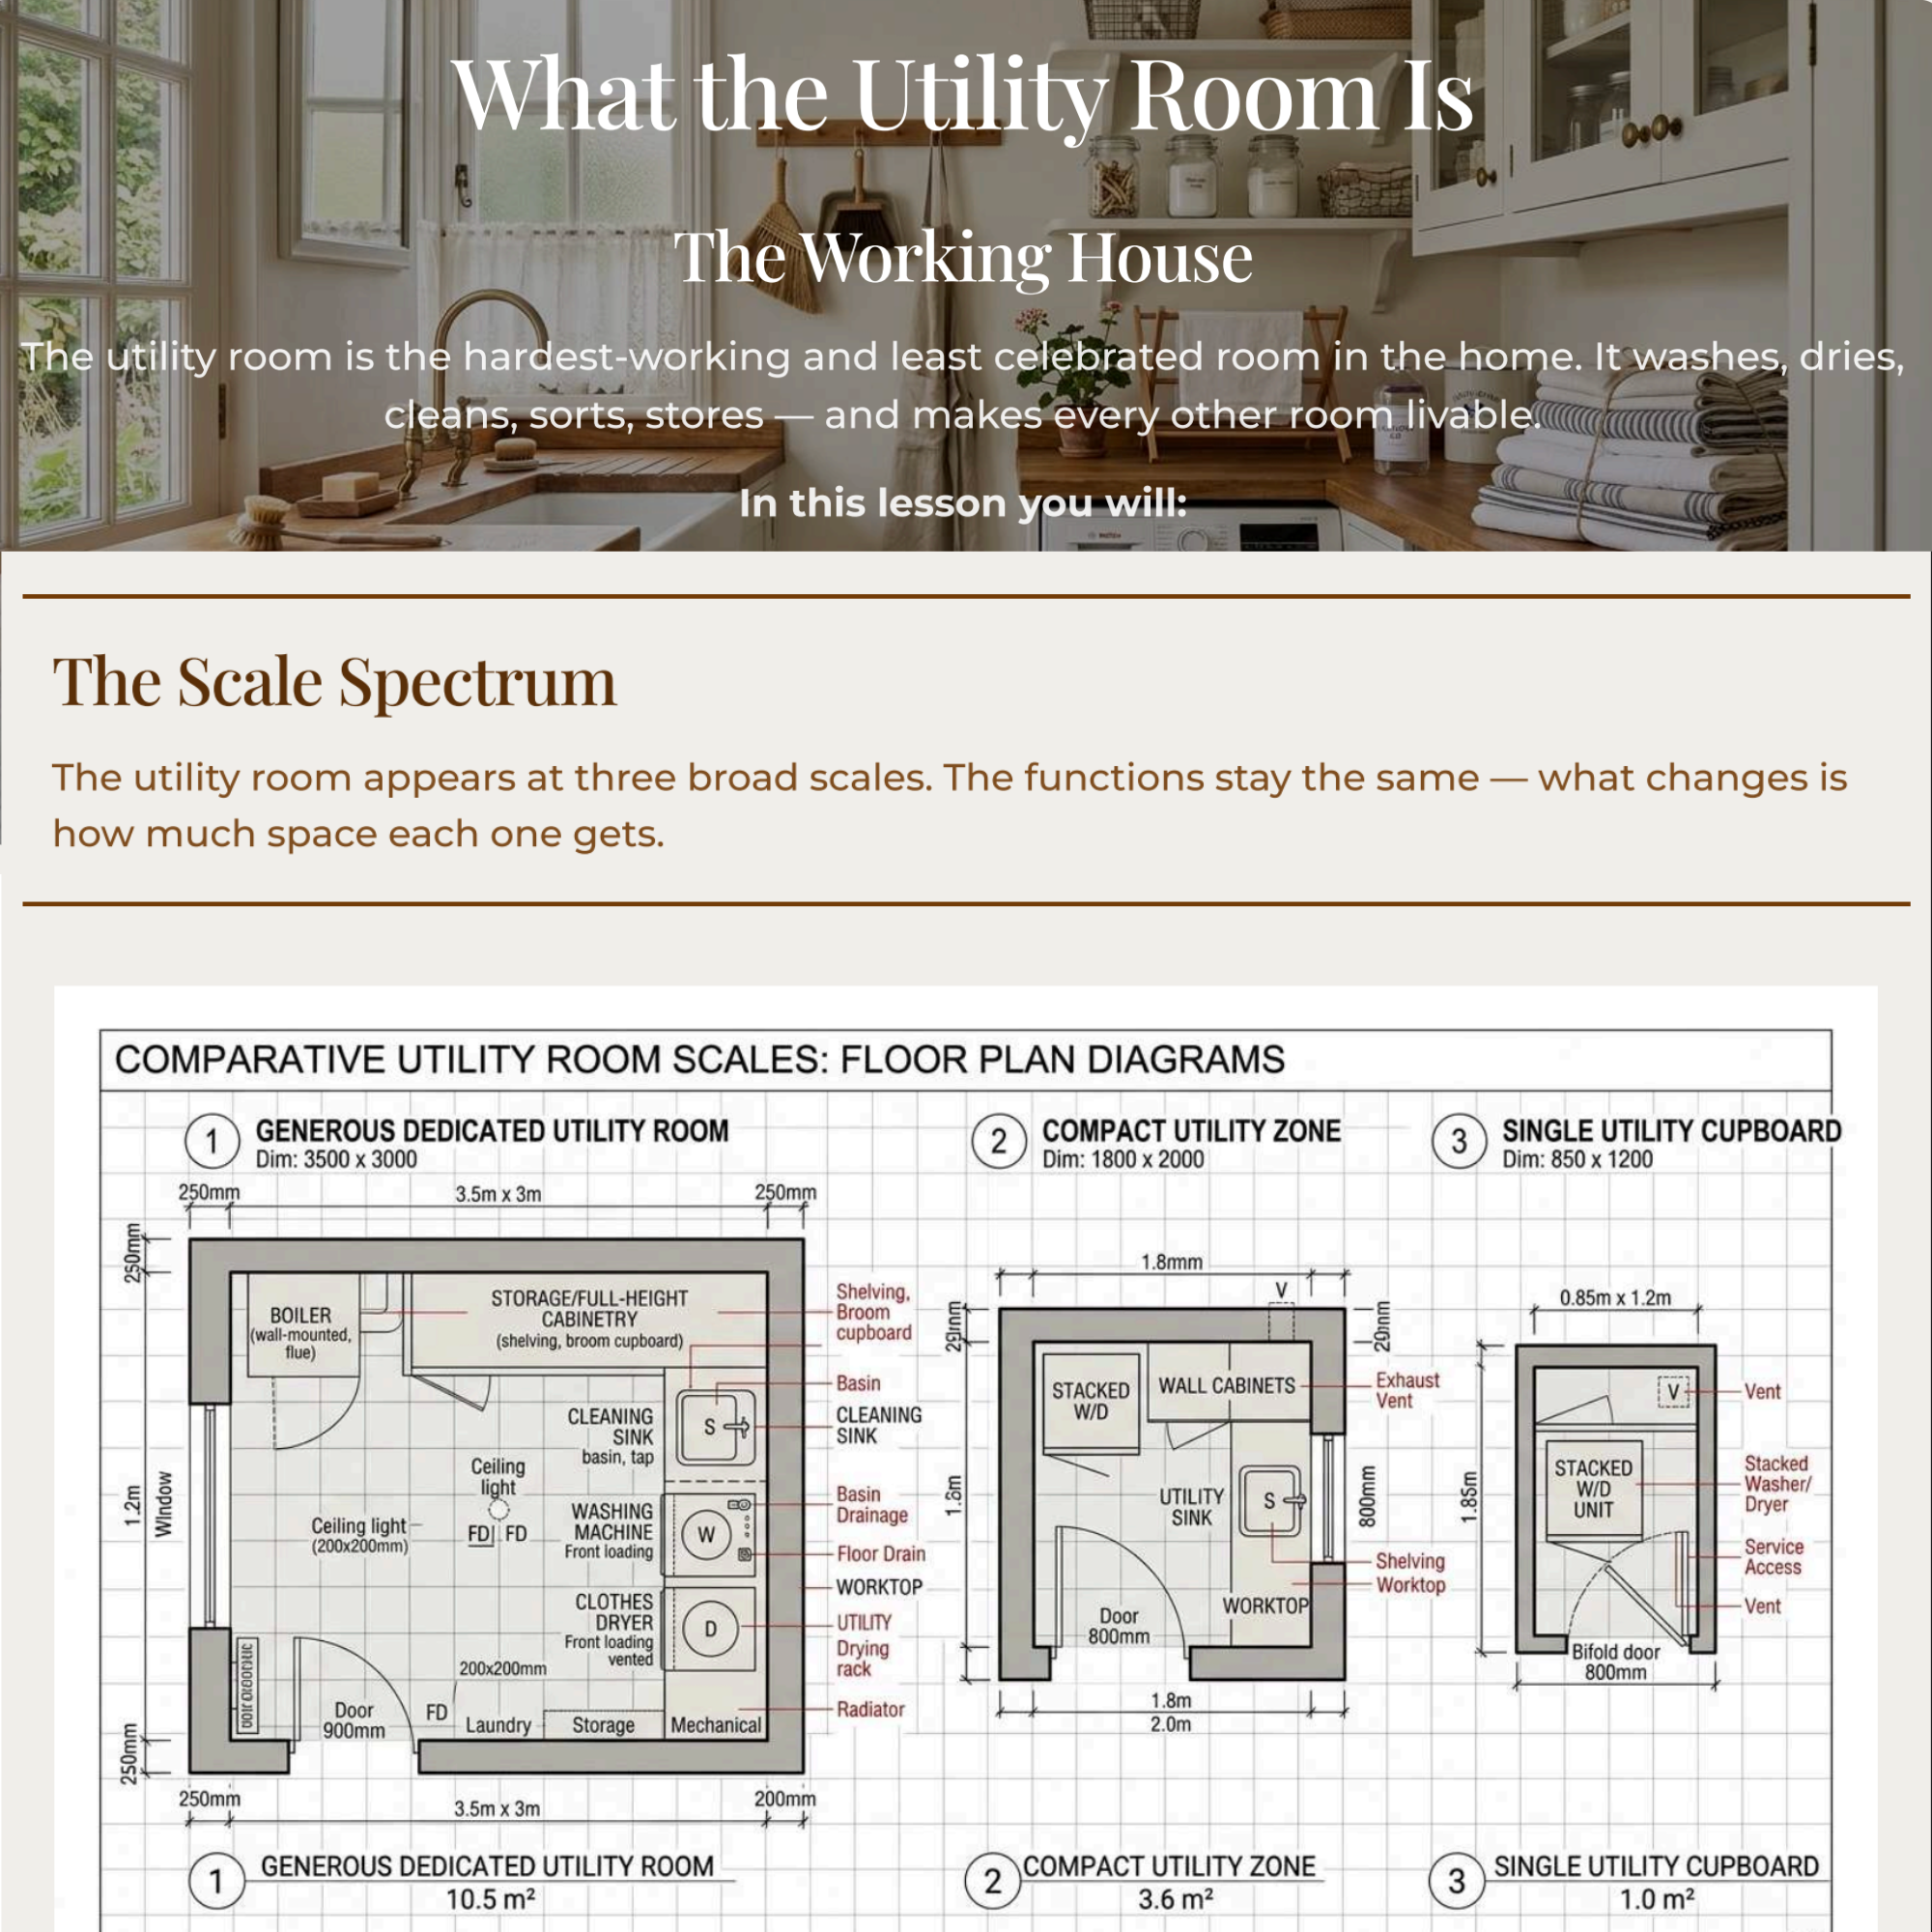
The course holds at any scale. The same functions are designed whether you have a generous dedicated room in a villa or a single tall cupboard, a stacked washer-dryer, or a kitchen-adjacent zone in an apartment — the apartment simply compresses what the villa can spread out. And where the utility room doubles as a back entrance, as it does across much of Europe, you design the wet and dirty side of that threshold: boot and pet wash, drip and dry-off, and the containment of mud and water tracked in from outside. The welcome, the outerwear, and the arrival side of that threshold belong to The Entry, so the two courses meet cleanly at the back door without overlapping.
By the end, you can design a utility room — at any scale, with or without a back-entrance role — that absorbs the working life of the whole home and survives years of it, and document it to a standard a contractor can price and build. The Utility Room sits in the Rooms layer of The Design Key and earns a Course Certificate counting toward the Master Programme.
Six modules. Twenty-nine lessons. Lifetime access. One method you apply to every utility room that follows.