


The demand for interior modelling skills is rapidly increasing as the design industry evolves with technology in 2025. More people than ever are exploring this field, thanks to advanced software and accessible online resources.
Beginners now have the opportunity to create professional-level 3D interiors from home. Whether you are a hobbyist, student, or aspiring professional, interior modelling offers a creative and profitable path.
This guide will walk you through the basics, essential tools, step-by-step modelling process, and practical tips. Start confidently on your interior modelling journey in 2025.
Understanding Interior Modelling: Basics and Benefits
Interior modelling is a digital design process where spaces are recreated virtually for visualization, planning, and presentation. In design and architecture, interior modelling encompasses both 2D and 3D representations. While 2D plans focus on layouts and measurements, 3D modelling brings spaces to life, allowing for detailed visualization from every angle. Key terms include mesh (the structure of objects), texture (surface detail), rendering (creating final images), and lighting (simulating real-world illumination). Real-world uses of interior modelling include virtual staging for real estate, architectural visualization for client presentations, and immersive VR walkthroughs for project previews.
What is Interior Modelling?
Interior modelling involves creating virtual representations of indoor spaces using digital tools. Designers use software to build 2D floor plans and 3D models that showcase room structure, furniture, and decor. The 3D aspect of interior modelling enables viewers to explore spaces interactively, making it invaluable for client presentations and design planning. Essential terminology includes mesh (object framework), texture (surface appearance), rendering (final image creation), and lighting (simulation of natural or artificial light). Examples include virtual staging for property listings, architectural visualizations for new builds, and VR walkthroughs for immersive experiences.
Why Learn Interior Modelling in 2025?
The design industry is evolving rapidly, with trends like remote work, virtual reality, and online property marketing increasing the need for digital skills. Interior modelling is now a must-have competency for professionals and hobbyists alike. According to Interior Design Industry Statistics 2025, 65% of interior designers use 3D modelling software in their workflow. This surge reflects growing opportunities in freelance work and digital design roles. Learning interior modelling in 2025 opens doors to diverse careers, from architectural visualization to virtual staging for real estate.
Core Benefits for Beginners
For beginners, interior modelling offers a creative outlet and a chance to develop spatial thinking. It allows experimentation with designs without the expense of physical materials. This digital approach enables easy revisions and fosters collaboration with clients or team members, even remotely. Building projects in interior modelling software also helps beginners assemble a professional portfolio, which is essential for securing jobs or freelance work. The low barrier to entry and abundance of resources make it accessible to anyone with an interest in design.
Common Challenges and How to Overcome Them
Starting with interior modelling can feel overwhelming due to the steep learning curve of new software. Achieving a balance between realism and creativity is another common challenge. Managing time effectively on complex projects is also crucial. To overcome these obstacles, beginners should leverage online courses, participate in community forums, and take on small practice projects. Regular practice and seeking feedback help build confidence and skill in interior modelling over time.
Essential Skills and Mindset for Success
Success in interior modelling requires patience, attention to detail, and a willingness to learn continuously. Developing an eye for design, understanding scale, and maintaining proportion are vital skills. Keeping up with industry trends and software updates ensures your interior modelling work remains relevant and competitive. Embracing feedback, staying curious, and practicing regularly will help you grow as a modeller and achieve your creative goals.
Essential Tools and Software for Interior Modelling
Choosing the right tools and resources is the first step to building a strong foundation in interior modelling. As technology moves forward in 2025, beginners have access to user-friendly software, advanced hardware, and a wealth of online support to help them succeed.
Choosing the Right Software for Beginners
Selecting the best software is crucial for anyone starting with interior modelling. There are several beginner-friendly options, each with unique features and learning curves. Here is a quick comparison:
| Software | Free/Paid | Platform | Key Features |
|---|---|---|---|
| SketchUp | Free/Paid | Windows/Mac | Intuitive, large library |
| Blender | Free | Windows/Mac | Powerful, open-source |
| Autodesk Homestyler | Free | Web-based | Drag-and-drop interface |
| Sweet Home 3D | Free | Windows/Mac | Simple, good for layouts |
When choosing interior modelling software, consider your computer’s specs, the availability of tutorials, and the size of the user community. Free software is ideal for learning, while paid versions offer advanced features for complex projects.
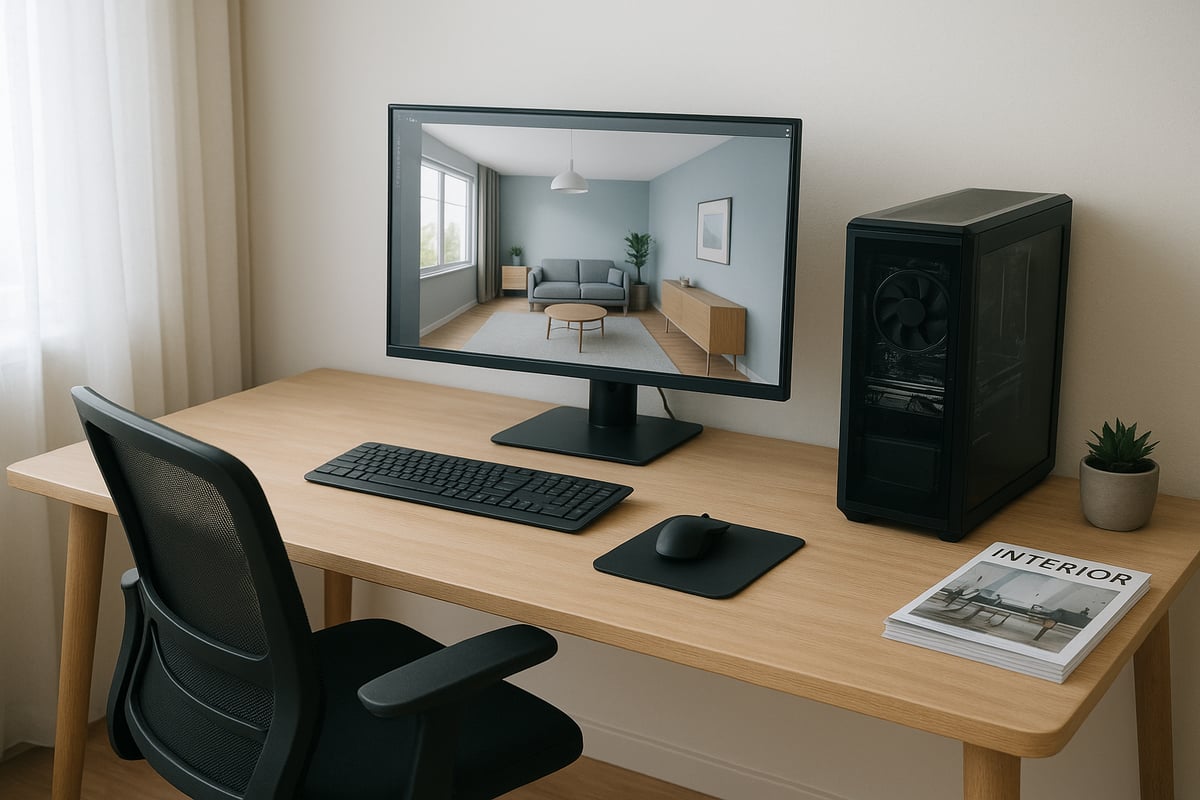
Hardware Requirements and Setup
To get the best results in interior modelling, your hardware should meet certain standards. At a minimum, look for:
- A multi-core processor for smooth performance
- At least 8GB RAM, though 16GB is recommended
- A dedicated graphics card (NVIDIA or AMD) for rendering
- A high-resolution monitor for detailed work
An ergonomic workspace is equally important. Position your monitor at eye level, use a supportive chair, and keep your desk organized to maintain productivity during long modelling sessions. Good hardware ensures your interior modelling projects run efficiently and look professional.
Must-Have Resources: Models, Textures, and Plugins
Access to quality resources will streamline your interior modelling workflow. Beginners should explore both free and premium 3D model libraries for furniture, decor, and architectural elements. Popular sites offer thousands of ready-to-use models and textures, saving time on every project.
Consider these essentials:
- Free model libraries like SketchUp’s 3D Warehouse or BlenderKit
- High-resolution texture websites for realistic materials
- Plugins for rendering engines and lighting tools to enhance your scenes
Using open-source collections can help you jumpstart your interior modelling projects without extra costs. Plugins and add-ons further increase efficiency and unlock new creative possibilities.
Online Learning Platforms and Communities
Continuous learning is key to mastering interior modelling. Beginners benefit from structured online courses and active communities where they can ask questions and share work. Leading platforms provide step-by-step video tutorials, covering everything from basic modelling to advanced rendering.
Joining forums and social media groups connects you with peers for valuable feedback and guidance. Some platforms offer mentorship programs or peer review, speeding up your progress. For those looking to start strong, Essential 3D Modelling Courses are a great way to build confidence and skills in interior modelling.
Staying Updated: Trends and Software Updates
The interior modelling landscape is always evolving. Keeping up with the latest software updates and industry trends ensures your skills remain relevant. Subscribe to newsletters from software developers and follow YouTube channels dedicated to 3D design.
In 2025, AI-powered tools are streamlining repetitive tasks, making interior modelling more efficient than ever. Engaging with the community helps you discover new plugins, workflow tips, and emerging design styles. Staying informed guarantees you never fall behind in this dynamic field.
Step-by-Step Guide: Creating Your First Interior Model
Embarking on your first interior modelling project can feel overwhelming, but breaking the process into manageable steps makes it accessible and enjoyable. Whether you are aiming for a realistic apartment, a cozy office, or a creative studio, following a structured workflow ensures your results are both polished and professional. This guide takes you through every stage, from initial planning to final review, empowering you to create impressive spaces using interior modelling techniques.
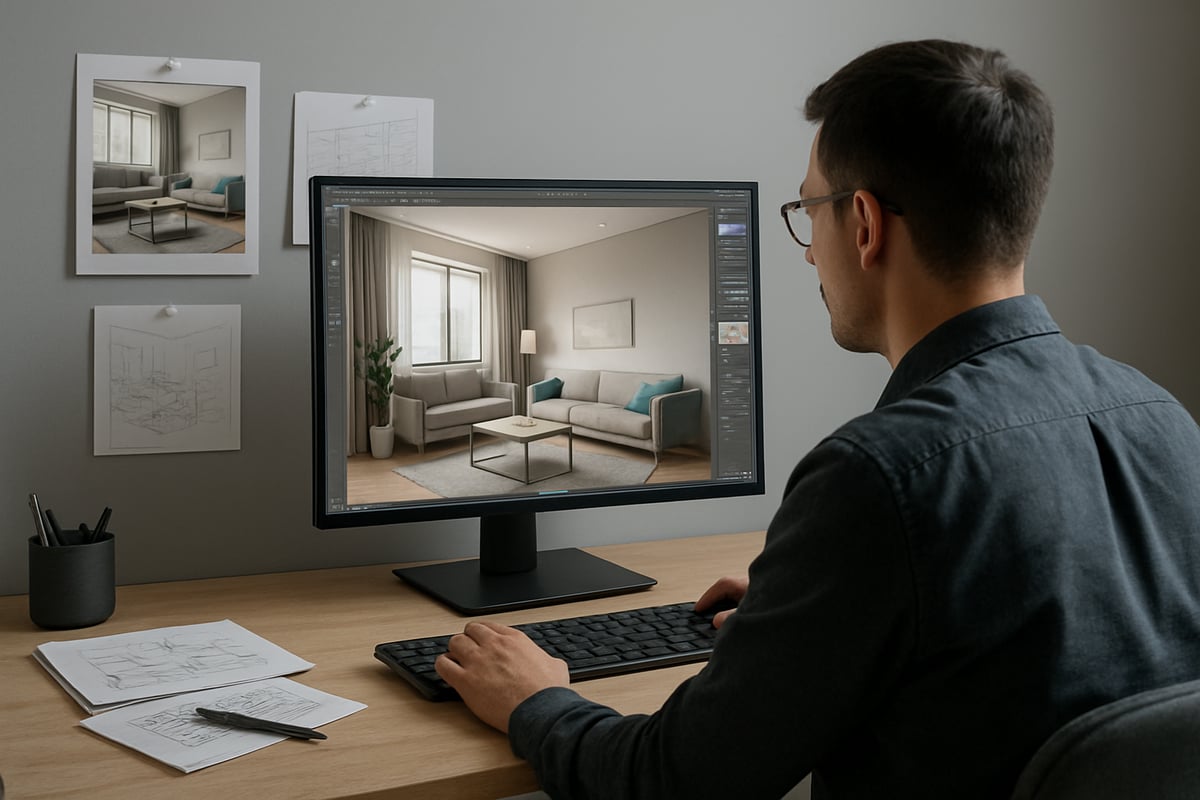
Step 1: Planning Your Space and Gathering References
The foundation of any successful interior modelling project starts with thoughtful planning. Begin by defining the purpose and style of your space. Are you designing a minimalist living room, a productive office, or a playful bedroom? Clarifying your vision at the outset saves time and guides your choices throughout the modelling process.
Next, gather inspiration. Create a moodboard with images from resources like Pinterest, design magazines, or architectural websites. Pay attention to color palettes, furniture styles, and lighting moods that resonate with your goals. This visual reference will inform your modelling decisions and help maintain consistency.
Measure the real-world dimensions of your intended space, if possible. Sketch a simple floor plan, noting wall lengths, window placements, and door locations. Accurate measurements are crucial for realistic interior modelling. Having clear references and a defined layout streamlines the transition from concept to digital model, ensuring your project starts on solid ground.
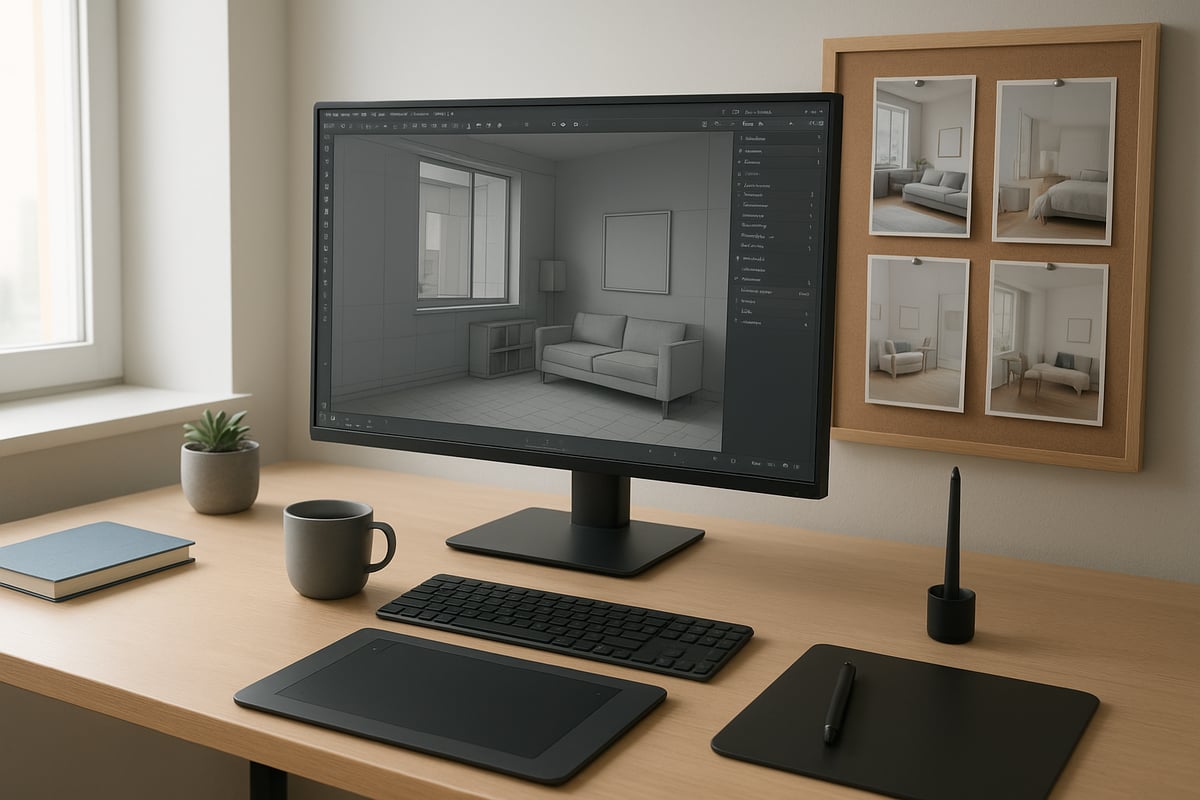
Step 2: Modelling the Room Structure
With your plan in hand, open your chosen interior modelling software and start building the room’s basic structure. Most tools offer intuitive ways to draw walls, floors, ceilings, windows, and doors. Begin by outlining the perimeter, then add architectural features according to your measurements.
Precision is key at this stage. Use grid and snapping tools to maintain accurate scale and alignment. Double-check wall heights and thicknesses to ensure realism. Many programs allow you to lock dimensions, preventing accidental changes as you progress.
Consider creating layers or groups for different elements, such as separating structural components from decorative features. This organization makes future edits easier and helps manage complex scenes. As you model, periodically switch to different viewing angles to catch errors early. Careful attention here forms the backbone of effective interior modelling, setting the stage for detailed customization in later steps.
Step 3: Adding Furniture and Fixtures
Once your room structure is complete, it’s time to bring the space to life with furniture and fixtures. Most interior modelling software supports importing 3D models of sofas, tables, chairs, lighting, and other essentials. For beginners, leveraging online resources can save significant time and elevate the quality of your work.
You can access a wide range of Ready-to-Use 3D CAD Collections to find pre-designed items that fit your vision. These collections provide diverse choices, from contemporary to classic styles, streamlining the furnishing process. Download models in compatible formats and import them into your project.
Arrange furniture thoughtfully, considering flow and functionality. Leave enough space for movement, and test different layouts to see what feels balanced. Use layers or groups to keep items organized. Thoughtful placement not only enhances the look but also showcases your understanding of interior modelling principles, making your scene both visually appealing and practical.
Step 4: Applying Materials and Textures
Materials and textures add depth and realism to your interior modelling projects. Start by assigning basic materials to surfaces: wood for floors, paint for walls, glass for windows, metal for hardware. Most modelling software provides material libraries, but you can also download additional textures for more variety.
Use UV mapping tools to ensure textures align correctly, especially on curved or complex surfaces. Adjust parameters like color, glossiness, and bump maps to mimic real-world finishes. For example, a wooden table may feature a subtle grain and a semi-matte sheen, while metal fixtures should reflect light differently.
Experiment with layering textures for added realism. Small details, such as fabric patterns on cushions or marble veining on countertops, make a significant impact. As you refine your materials, frequently preview your model under different lighting to catch inconsistencies. Mastery of this step differentiates basic interior modelling from truly immersive digital environments.
Step 5: Lighting Your Scene
Lighting is a pivotal element in interior modelling, shaping mood and bringing your space to life. Begin by considering the types of lighting your scene needs: natural sunlight, artificial fixtures, and ambient sources. Most software allows you to add directional, point, and area lights.
Position windows to take advantage of natural light, then supplement with lamps, ceiling lights, or wall sconces as needed. Adjust intensity and color temperature to match the time of day or desired atmosphere. For instance, cool daylight creates an energetic feel, while warm evening tones evoke coziness.
Use shadows strategically to enhance depth and realism. Test different lighting setups by rendering test images. In interior modelling, well-planned lighting not only highlights your design but also reveals the nuances of your materials and spatial arrangement. Remember, lighting can transform a simple model into a captivating virtual experience.
Step 6: Rendering and Exporting Your Model
Rendering translates your interior modelling work into high-quality images or animations, ready for presentation or sharing. Set up camera angles that best showcase the space, highlighting focal points and interesting perspectives. Experiment with wide shots for overall views and close-ups for details.
Configure render settings to balance quality and performance. Adjust resolution, sampling, and lighting parameters for crisp, realistic results. Some software offers real-time rendering, while others require longer processing times. Avoid common pitfalls like overexposed lights or grainy shadows.
Once satisfied, export your renders in preferred formats, such as JPEG or PNG. If your software supports it, create walkthroughs or 360-degree panoramas for immersive experiences. Rendering is the final polish in interior modelling, transforming your digital effort into shareable, professional-grade visuals that effectively communicate your design intent.
Step 7: Reviewing and Refining Your Work
The last step in interior modelling is review and refinement. Step back and assess your model critically, checking for proportion errors, misplaced objects, or unrealistic materials. Fresh eyes often catch details missed during the initial build.
Seek feedback from peers or online communities, as outside perspectives can provide valuable insights. Many platforms offer constructive critiques and suggestions for improvement. Implement changes iteratively, saving different versions to track your progress and maintain a backup.
Document your process by capturing before-and-after images or writing a brief summary of your workflow. This not only aids personal growth but also builds a portfolio to showcase your interior modelling skills to potential clients or employers. Consistent review and refinement foster continual learning and help you achieve professional results in every project.
Practical Tips for Improving Your Interior Models
Improving your interior modelling skills goes beyond mastering software. Success comes from attention to detail, smart workflow habits, and a strong portfolio. By focusing on these practical areas, you can elevate your work and stand out in a competitive field.
Developing an Eye for Detail and Realism
To excel in interior modelling, closely observe real-world spaces. Study how natural light interacts with materials, and notice subtle details like shadows, reflections, and surface imperfections.
- Add small elements such as books, plants, or everyday clutter to create a lived-in feel.
- Use high-resolution, photorealistic textures for floors, furniture, and walls.
- Reference real interiors to inspire layout and decor choices.
Focusing on details helps your interior modelling projects feel authentic and immersive. Over time, developing this eye for realism will set your work apart.
Mastering Composition and Camera Angles
Effective composition is vital for impactful interior modelling renders. Choose a focal point that draws the viewer’s attention, such as a statement sofa or unique lighting fixture.
- Apply the rule of thirds when setting up camera views.
- Use leading lines to guide the viewer’s gaze through the space.
- Compare static, flat perspectives with dynamic angles to see the difference.
Experiment with camera placement to showcase your design’s strengths. Thoughtful composition makes your interior modelling presentations more engaging and professional.
Speeding Up Your Workflow
A streamlined workflow is essential for productivity in interior modelling. Learn keyboard shortcuts and organize assets for quick access. Batch process repetitive tasks, such as applying materials or rendering multiple views.
- Set up template files for common room types.
- Build a personal library of favorite models and textures.
- Use plugins to automate lighting or rendering.
For a comprehensive approach, check out this Step-by-Step Interior Design Guide to enhance your modelling process from concept to completion. Efficient habits save time and let you focus on creative problem-solving.
Troubleshooting Common Modelling Issues
Interior modelling often presents technical challenges. Mesh errors, overlapping faces, and lighting glitches are common for beginners. Approach these issues methodically.
- Double-check mesh integrity before applying materials.
- Use wireframe or shaded views to spot geometry problems.
- Consult online forums for solutions to specific software errors.
Learning to troubleshoot effectively builds confidence and ensures your interior modelling results are polished and error-free. Practice and patience are key to mastering these skills.
Building a Standout Portfolio
A strong portfolio is crucial for showcasing your interior modelling expertise. Curate your best work, highlighting a variety of styles and project types. Include before-and-after shots or process breakdowns to demonstrate your workflow.
- Write clear project descriptions detailing your role and techniques used.
- Tailor your portfolio for potential employers or freelance clients.
- Consider platforms like Behance or your own website to present your work.
A well-organized portfolio not only displays your interior modelling skills but also communicates professionalism and growth to the industry.
Career Paths and Opportunities in Interior Modelling
The world of interior modelling offers a diverse range of career opportunities for both newcomers and experienced creators. With the demand for digital design skills rising, professionals can explore multiple pathways, from independent freelancing to specialized industry roles. Below, we break down the main routes you can take as you build your career in interior modelling.
Freelancing and Remote Work
Freelancing in interior modelling has become increasingly accessible, especially with the rise of online marketplaces and remote collaboration tools. Platforms such as Upwork, Fiverr, and Behance allow you to showcase your portfolio and connect with clients worldwide. Setting competitive rates requires research and a clear understanding of your skill level, project scope, and market demand.
To succeed, prioritize transparent communication, clear deliverables, and reliable timelines. Many successful freelance interior modellers share their project journeys online, building trust and attracting repeat clients. Remote work offers flexibility, enabling you to manage multiple projects and clients from anywhere. By developing a strong reputation, you can turn interior modelling into a sustainable source of income.
Working with Design Studios and Agencies
Joining a design studio or agency provides structured growth and valuable mentorship for those starting in interior modelling. Entry-level roles often involve assisting with 3D visualizations, preparing project presentations, and collaborating on team assignments. Employers seek candidates with technical proficiency, creativity, and a willingness to learn new tools.
Industry statistics show that 80% of design firms now use 3D modelling to present concepts to clients. According to the Interior Design Market Trends 2025, the demand for digital skills and visual presentation is expected to grow steadily. Working in a collaborative environment helps you refine your abilities and gain exposure to diverse project types.
Specializations and Advanced Skills
As you progress in interior modelling, specializing can open doors to high-demand niches. Areas such as VR and AR interiors, sustainable design, and animation require advanced technical knowledge and a passion for innovation. Staying competitive means continuously updating your skills through online courses, certifications, and self-directed projects.
The Craft'n Build Academy for Modellers offers tutorials, resources, and a supportive learning community, making it easier to master new techniques. Transitioning from generalist to specialist allows you to command higher rates and tackle more complex projects. Embracing lifelong learning is essential for long-term success in interior modelling.
Building Your Personal Brand
Establishing a strong personal brand is crucial for standing out in the interior modelling field. Networking in design communities, both online and offline, helps you share knowledge and discover new opportunities. Platforms like LinkedIn and Instagram are effective for showcasing your expertise, documenting your process, and connecting with potential clients or employers.
Consider starting a blog, sharing tutorials, or participating in design challenges to build credibility. A well-curated portfolio, combined with active engagement, signals professionalism and commitment to the craft. By consistently demonstrating your skills and growth, you can expand your reach and influence within the interior modelling community.
Craft’n Build Design Co.: Empowering Your Interior Modelling Journey
Starting your interior modelling journey can feel overwhelming, but with the right support and resources, you can build skills and confidence quickly. Craft’n Build Design Co. positions itself as a comprehensive hub for beginners and aspiring professionals, offering everything you need to succeed in the fast-evolving world of interior modelling.
One of the standout features of Craft’n Build is its extensive library of pre-designed 3D furniture and decor models. These assets can be instantly integrated into your projects, removing the initial barrier of creating every object from scratch. This approach allows you to focus more on creativity and layout, streamlining the interior modelling process for newcomers.
Flexible, self-paced online courses are a core offering at Craft’n Build. Designed specifically for beginners, these courses cover essential interior modelling and design skills, from understanding software basics to mastering advanced techniques. Whether you are a student, hobbyist, or looking to pivot into a new career, you will find the curriculum approachable and practical.
For those requiring tailored solutions, Craft’n Build provides custom design and sourcing services. This is especially valuable for small businesses or freelancers aiming to deliver unique results to clients without spending countless hours on complex modelling tasks. The company’s experts can help transform your concepts into polished, professional 3D assets.
Community is at the heart of Craft’n Build. The platform offers inspiration blogs, opportunities for peer feedback, and structured mentorship. Engaging with others who share your passion for interior modelling can accelerate your growth, provide fresh ideas, and help you overcome creative roadblocks.
Membership plans unlock additional benefits, including exclusive resources, discounts, and early access to new features or content. This ensures that your learning and creative development continue as you progress, keeping you ahead in the competitive landscape of interior modelling.
Global accessibility is a major advantage. Craft’n Build supports multiple languages and offers international shipping for physical products, making it easy for aspiring modellers worldwide to access professional-grade resources and support.
The interior design sector is growing rapidly, driven by technology and new market demands. According to the Interior Design Market Growth Forecast, the industry is set to expand significantly between 2025 and 2033. Craft’n Build aligns its offerings with these trends, ensuring users are equipped for future opportunities.
Ultimately, Craft’n Build bridges the gap between learning, creating, and professional development. By offering tools, education, and a supportive community, the platform empowers you to transform your passion for interior modelling into real-world expertise and career potential.
As you step into the world of interior modelling, it’s all about building a strong foundation and exploring the creative possibilities technology now offers. We’ve covered essential skills, tools, and practical steps to help you start your journey with confidence. If you’re eager to put your knowledge into practice and want structured guidance tailored for beginners, you’ll find tremendous value in learning the principles of professional design from the ground up. Take the next step and Get started with Interior Design to turn your ideas into beautifully modelled spaces—you’re ready to begin.
共有:
interior design guide 2025 - All About Interior Designing.